Two ways to make a microphone from ordinary headphones. DIY microphone - tips and tricks on how to make a homemade sound recording device How to make a microphone from
It’s very difficult to do without a computer microphone now, you can’t use voice search without it, you can’t chat with a friend via video link. However, not all computers have built-in microphones, moreover, they often do not have very good sensitivity. You can solve this problem quite simply - assemble the microphone yourself.
Scheme
The circuit is extremely simple, containing only two resistors, two capacitors, a transistor and an electret microphone capsule. The transistor can be applied to almost any low-power n-p-n structure, for example, KT3102, BC547, BC337. An electret microphone can be obtained, for example, in a broken headset, telephone receiver, or you can buy it at a radio parts store. The sensitivity of the microphone will greatly depend on this element, so it is advisable to take a few and check which one is best suited. The advantage of this circuit is that it uses phantom power. Those. the audio signal is transmitted through the same wires as the power. If you take a voltmeter and measure the voltage at the microphone input of the computer, there will be about 3-4 volts. When connecting the microphone circuit, this voltage should drop to a level of 0.6-0.7 volts, so an external power source is not needed and there will be no extra wires at the workplace.
Circuit Assembly
The circuit contains a minimum of details, so it can be assembled by surface mounting. But, keeping with tradition, I etched a miniature circuit board. Paths can be drawn even with a marker or nail polish. A few photos of the process:

Download board:
(downloads: 206)
A microphone capsule is soldered at one end of the board, and a shielded wire at the other. Please note that the wire must be with a screen, otherwise the microphone will be terribly phony. The braid of the wire is soldered to the minus, and the two inner cores are connected and soldered to the output of the circuit. Be sure to observe the polarity of the microphone capsule, otherwise the circuit will not work. One of his conclusions goes to minus, and the second to plus. Determining the polarity is very simple - you need to ring the conclusions with the metal case of the capsule. The terminal that connects to the body is negative.


Microphone Assembly
The board with soldered parts must be placed in a suitable case for ease of use. Because the board has a narrow elongated shape, then an ordinary ballpoint pen can be used as a case. To do this, you need to pull out the writing rod from it and check if the board fits in width. If the circuit is assembled by surface mounting, then it can be given any shape and there will be no problems with capacity. In addition to a pen, any elongated object will work well, whether it's a marker or a simple plastic tube.A microphone is a device that converts sound vibrations into electrical current. In sound transmission, the microphone is the primary link in sound reception. A microphone is a useful device that can be used to communicate on the Internet, as well as to record voice or sounds (instruments, special effects). However, high-quality microphones cost a lot of money, and cheap ones will not be able to provide sufficient sensitivity and quality.
In this article, we will tell you how to make a microphone suitable for daily use with your own hands.

What can you use a homemade microphone for?
Of course, making a condenser microphone for vocals or podcasts with your own hands is almost impossible - their device is too complicated, which can become a hindrance for a person who is poorly versed in electronics.

Electret microphones are much simpler in design and therefore more reliable. In addition, the small size and low cost of electret microphones allow them to be used almost anywhere where sound reception may be required.


Here is an easy way to make such a microphone with your own hands.
What will be needed?
- Electret capsule - you can pull it out of an old cell phone or radio;
- Jack 3.5 plug for connecting a microphone to a computer;
- Microphone body - a cylinder from a syringe is well suited;
- Paper clip - for fixing the case and further attaching the microphone, for example, to clothing;
- Thin wire - cut off a small section 1-1.5 meters long;
- Black foam - a small piece to protect from the wind.

Manufacturing procedure
To make it easier for you to navigate, look on the Internet for photos of a homemade microphone or a standard electret microphone (“labeled”).
- To make a microphone body - you need to cut off the tip from the syringe body with a knife. You can erase the divisions on the syringe with a solvent;
- Insert a wire through the cone of the syringe and tie a knot at its end to secure the microphone in the body;
- Solder the electret capsule to the wire from the node side - connect the shielded braid to its body;
- Install the primer in the body, and fix the cone with the eye of a clerical clip;
- Solder the second end of the wire with the plug, additionally connecting the left and right channels together;
- In a piece of foam rubber, make a narrow round hole for the microphone. With a knife, you can cut off extra corners - this way you get a decent windproof cap.

That's it, your homemade microphone is ready! You managed to create a sensitive measuring microphone with your own hands, which is also well suited for communication.

DIY microphone stand
As a rule, expensive and high-quality microphones are bought for serious work or hobbies, whether it is professional sound recording, broadcasting or vocals.


In the vast majority of cases, for comfortable work and for the closest access to the sound source, you have to additionally purchase a special stand for such microphones. Now we will tell you how to make a desktop microphone stand at home.

What will be needed?
Lamp on the clamp - can be purchased at any electronics store. Attention: the mass of the lamp must correspond to the mass of your microphone, otherwise the microphone on a weak clamp will easily fall under its own weight.

The holder depends on the type of your microphone: for a dynamic microphone, a holder can be purchased at a price of 250 rubles, for a condenser (spider type) - at a price of 500 rubles.

It is possible to find and purchase an adapter for a microphone holder for easy installation on a clamp.

Manufacturing procedure
- Cut and pull out the lamp wire;
- Disassemble and remove the lamp shade;
- Attach the microphone mount to the thread to the pantograph of the lamp - due to a mismatch in the thread, you can only screw the microphone mount once;
- Attach the microphone holder to the mount;
- Install the microphone itself in the holder, fix the stand to the table.

Ready! Now you have a convenient adjustable microphone stand that can be easily attached to the table, and the clamp design allows you to screw a pop filter and other accessories to it.

DIY microphone photo


Almost all headsets that are designed to work with a PC have such “pathetic” characteristics that if you try to use a microphone from such a headset for sound recording or the same karaoke, you will get nothing but disappointment. There is only one reason for this - all such microphones are designed for speech transmission and have a very narrow frequency range. This not only reduces the cost of the design itself, but also contributes to speech intelligibility, which is the main requirement of the headset.
Attempts to connect a conventional dynamic or electret microphone usually end in failure - the level from such a microphone is clearly not enough to "build up" the sound card. Additionally, ignorance of the input circuit of sound cards affects and incorrect connection of a dynamic microphone ends the matter. Assemble a microphone amplifier and connect it “wisely”? It would be nice, but much easier to use the IEC-3 microphone, which was at one time widely used in wearable equipment and is still quite common today. But of course, you will have to connect “by mind”.
This electret microphone has fairly high characteristics (frequency range, for example, lies in the range of 50 - 15,000 Hz) and, most importantly, it has a built-in source follower assembled on a field-effect transistor, which not only matches the high resistance of the microphone with the amplifier, but it also has more than enough output level for any sound card. The only drawback, perhaps, is that the microphone needs power. But its current consumption is so small that two AA batteries connected in series will last for many months of continuous operation. Let's take a look at the internal circuit of the microphone, which is located in an aluminum cup, and think about how to connect it to a computer:

The gray color indicates an aluminum cup, which is a screen and is connected to the common wire of the circuit. As I said, such a microphone requires external power, and minus 3-5 V must be applied to the resistor (red wire), and plus to the blue one. From white we will remove a useful signal.
Now let's take a look at the computer's microphone input circuit:

It turns out that the signal should be applied only to the very tip of the connector, marked green, and the sound card itself supplies +5 V to the red one through a resistor. This is done to power the headset pre-amps, if used. We will not use this voltage for two reasons: firstly, we need a different polarity, and if we simply “turn over” the wires, then the microphone will “receive” a lot. Secondly, the PC power supply is pulsed and the interference at these five volts will be decent. The use of galvanic cells in terms of interference is ideal - pure "permanence" without the slightest ripple. So, the complete scheme for connecting our microphone to a computer will look like this.
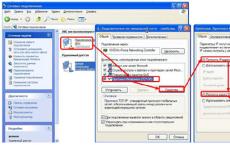
You can not only play around with voice search on Google (there are a lot of extensions for the Chrome browser for this, they are almost all the same, they use the same thing, but it seemed to me the most convenient extension “Voice search 2.02 - a microphone icon appears in all input forms by clicking on which can be said or dictated rather, for example, a search query as in the picture) but already with speech recognition somehow, but still work.
From Siri on Apple, I didn’t manage to achieve some kind of reciprocity, to the extent that it could be “used” for something serious, all the same, “imprisonment” for English affects, and I already know the addresses of the nearest dumplings. In any case, Google remains the leader in speech recognition, voices, it's a pity there is no way to use it programmatically and in Russian.
So the main weak point of microphones is sensitivity, and then of course the price.
Here is an example of how you can get around these two restrictions and for very little money, and if you have the details listed below, then for free, get a fairly sensitive home-made microphone. A photo of how to do it yourself, a description of the work and a microphone diagram below.
Made by me homemade microphone has high sensitivity and is able to perceive even the ticking of the clock at a distance of several meters. It also allows you to record high-quality sound using a computer. The recording quality also depends on the capabilities of the sound card in the system unit. In the design of the microphone unit, components of end-of-life electronics are used to the maximum.
An electret microphone can be taken from any old radio (in extreme cases, from a mobile phone). I used two microphones at once (+), which made it possible to significantly expand the sound perception diagram. The signal from the microphones, amplified by the low-noise transistor VT1, is fed to the operational amplifier DA1 (see Fig. drawing - microphone diagram). The amplifier output can be connected to ordinary headphones or fed further to signal recording and processing devices (desktop computer, laptop, etc.).
Drawing 1. Microphone diagram
The microphone amplifier is powered by the battery of any old mobile phone. Its battery life is tens of hours. You can use a free USB port on your computer to charge the battery. The amplifier can be left constantly connected to the port, since the charging current is small. I took the wire with the USB connector from the mouse. The connector at the output of the amplifier used 03.5 mm, - as for headphones - from any player, the volume control - too, and the rest of the details, including the SA1 power switch, - any small-sized ones.
All components should be placed on a small fiberglass board (photo 1 - above). I glued a small piece of foam rubber to the battery, and laid the board on top (photo 2). All this was well pulled off with electrical tape and tried on the regulator knob (photo 3). Then, to eliminate interference and interference, such a “sandwich” was placed in a tin screen, which was soldered to a common wire (photo 4, 5).
Microphones must be fixed in a piece of dense soft material. After that, in a piece of foam rubber (which, for example, is used for washing a car), I cut out a niche and inserted the entire block into it (photo b, 7), and pulled a fabric cover over it (photo 8). It is only necessary to provide slots for the plug, switch and volume control.
 1 PC. handmade felt homemade fabric flowers craft feltro…
14.05 rub.
Free shipping★★ ★★ ★★ ★★ ★★ (4.80) | Orders (268)
In this article I will tell you how to make a microphone, because a truly sensitive microphone can only be made with your own hands, more precisely, by remaking a standard microphone. Of course, many can argue with this statement, but not those who approached this issue seriously. Very often, people spend a huge amount of time setting up a microphone and finding the best combinations of a PC sound card and a microphone itself. In addition, if you have a laptop, then in most cases the sound systems in such computers also leave much to be desired. Well then, let's get down to business.
How to make a microphone yourself
In the design of the microphone unit, we will use elements of electronics that have already served their time. Take an electret microphone from any old tape recorder or radio. If there are none at home, then a microphone from a mobile phone will do. You can even use two microphones at once, this will allow you to significantly expand the direction of the sound. The signal from the microphone or microphones must be amplified by a low-noise transistor of the VT1 type, then the signal will be fed to an operational amplifier of the DA1 type. The output of this amplifier can be connected both to ordinary headphones and further to processing or recording devices (for example, a laptop or a desktop computer). We will power the amplifier from the battery of an old mobile phone. They (mobile phone batteries) are good because the battery life of a microphone from such a battery will be tens of hours. And to charge the battery, use any USB port on your computer. Now about the amplifier. It is quite possible to leave it included in the port all the time, since the charging current in this case will be very small. The wire with the USB connector can be taken from the mouse. At the output of the amplifier, it is best to use a 3.5 mm jack - the same as for the headphones from the player. The volume control is also suitable from the headphones, and the rest of the details, for example, the SA1 power switch, must be made up of any small-sized ones.
DIY microphone: finishing touches
Now we place the microphone components on a small board made of fiberglass. Next, glue a small piece of foam rubber onto the battery, and then lay the board on top. Now we tighten it all up with electrical tape and try on the regulator knob. After that, to eliminate interference and interference, we place our design in a tin screen, soldering it to a common wire. Please note that the microphone or microphones must be fixed in a piece of soft but dense material. Then we cut out a niche in a piece of foam rubber and insert the entire block into it, and from above we pull a fabric cover over it. By the way, foam rubber can also be used the one that is used for washing a car. Well, that's almost all - it remains only to make slots for the plug, as well as the volume control and switch. I note that such a microphone will be much better than any factory products, excluding, of course, professional equipment. But the fact is that for such equipment you will have to pay more than tens of thousands of rubles, and the cost of our product is a maximum of a thousand, given that we assembled it almost entirely from old parts. So, if you are not engaged in professional recording and you need a microphone for your personal purposes, then such a home-made design will come in handy.