I share my experience. How I did my own MacBook Air maintenance. Disassembly of the Apple MacBook Pro with Touch Bar showed that it is better to be very careful with the device How to clean dust from the MacBook A1502
The dismantling of iFixit is always good because it can be used to visually track all the changes that the speakers were talking about and the press was noisy. Having collected enough positives and negatives about the new MacBook Pro, we decided to dive into the "iron" wilds, and the engineers, who constantly fly to Australia to snatch the latest releases first-hand, promptly provided a complete analysis of the MacBook Pro 13″ without Touch Bar.

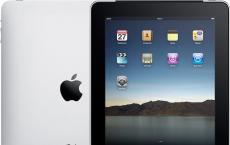
A model without a newfangled socket was chosen to be torn apart. Its characteristics:
- 13.3″ IPS Retina display delivering 2560 x 1600 pixels (227 ppi) resolution at P3 color depth
- 2.0 GHz Intel Core i5 Skylake processor (Turbo Boost up to 3.1 GHz) with integrated Intel Iris Graphics 540 video chip
- 8 GB of RAM with a frequency of 1866 MHz LPDDR3 (16 GB can be installed)
- 256 GB, 512 GB, or 1 TB SSD
- two Thunderbolt 3 (USB-C) charging ports, DisplayPort, Thunderbolt, USB 3.1 Gen 2
- Silver or Space Grey.

When examining this MacBoo Pro model from all sides, nothing was found except two Thunderbolt 3 ports on the left and one lone 3.5 mm jack on the right. It turns out that the policy that the Cupertinos applied to the iPhone 7 does not work on Macs ... not yet. I wonder if this is good or bad? :)

Assembly A1708 does not flaunt a touch panel with emoticons, but here there was a place for an unusually long mechanical Escape button. Of course, along with the rest of the functional range.

Maniacs who compare the dimensions of Apple's already thin and weightless laptops (ultrabooks) from Apple can enjoy the image above, where the new MacBook Pro 13″ sits next to a simple MacBook 12″. Here, by the way, a single design trend can be seen with one's own eyes. And how striking is the double-grown trackpad!

So, it’s already enough to admire and it’s time to move on to a direct analysis, especially since the first step has not changed for 6 years. Yes, yes, the Pentalob screws on the back cover have been marinated for six years. The number of "6" was also reflected in the number of fasteners, the number of which also decreased from 8 pieces in the MacBook 2015 and from 10 pieces in most MacBook Pro.

But the back cover itself showed serious resistance, so it was not without the use of a suction cup, which has proven itself when dismantling the iPhone. You need to pick up a piece of metal, and then pry it with a pick to get to the electronics.

What immediately came to mind were the protected T5 screws, which are solid protection for the battery pack.

Behind the hinged connector flap, there were two small copper pads responsible for plus and minus (ground).

Then, guided by intuition, iFixit engineers made it easier to remove the trackpad, which is no longer hidden under the battery. Behind the Force Touch, by the way, was fixed the same “magic” magnet, which is held solely on screws and spring connectors.

The following components are responsible for the trackpad:
- red - ST Microelectronics STM32F103VB ARM Cortex-M3 MCU chip
- orange - Broadcom BCM5976C1KUFBG touch controller
The ease with which the experts got to the trackpad was instantly balanced by a copious amount of glue on the way to the battery. Old friends, a heater and a plastic spatula, came in handy again.

Lithium-polymer blocks left the sticky bath and revealed the first really important fact - a 27% reduced battery capacity. Even without looking at the specifications, where 4781 mAh is printed, the deprivation becomes obvious, because the MacBook Pro 13″ has three panels instead of six.

SSD in "camouflage" instantly drew attention to itself. After removing the protective tape, the PCI-e standard board successfully undocked, confirming the second fact - self-replaceable solid-state drives, but we remind you that you won’t be able to install any SSD, you still have to fork out.


A more meticulous inspection of the vault revealed the manufacturer and other components. Drive manufactured by SanDisk, now owned by Western Digital; other details below:
- red - SanDisk SDRQKBDC4 064G 64 GB flash memory (4 pcs.)
- orange - Apple controller 338S00227
- yellow - Texas Instruments 58879D MOSFET
- green - F4432ACPE-GD-F type Micron 512 MB DDR2 RAM
- blue - soldered Apple SSD controller 338S00199

Removing the speaker has traditionally not been done with one left hand, because it was protected by screwed-on gaskets to dampen the vibrations that new speakers with an improved “boom effect” are sure to produce.

Now nothing prevented the release of the motherboard, where it turned out that the "improved architecture" was actually a change in the position of the radiator screws on the rear wall.


- red - SKhynix H9CCNNNBJTML
- orange - Texas Instruments TPS51980 Buck Converter for memory power management
- yellow - Universal Scientific Industrial 339S025 Wi-Fi module
- green - Intel DSL6510 Thunderbolt 3 controller
- blue - Texas Instruments 58873D Synchronous Buck NexFET Power Block MOSFET Pair
- blue - Broadcom BCM15700A2 camera processor
- purple - Micron 512 MB DDR3L SDRAM

On the other side:
- SKhynix H9CCNNNBJTML LPDDR3 high-speed synchronous DRAM
- Texas Instruments SN650839 66AL7XWGI (as seen in the 2016 Retina MacBook)
- 2x Texas Instruments CD3215B03 66AQ8YW G1
- Winbond SpiFlash 64 Mb serial flash memory
- Texas Instruments TM4EA231 H6ZXRI system management controller
- Cirrus Logic CS42L63A Audio Codec
- Intersil 95828 HRTZ X630MRR

Now about the full-fledged survivor - a 3.5 mm headphone jack, but as a single module, to which 2 microphones are attached, stretching down to the fan.

To everyone's surprise, Apple carried over the fans from the 2012 model. Local "carlsons" are very, very quiet due to the asymmetric fit of the blades.


Just below the screen, the hardware responsible for the life of a huge number of Retina pixels was discovered:
- B1332BDPA 090BX 1605
- National Semiconductor 67A800U 49B1-04
- Texas Instruments 65CLKEI TPS65157
- NXP LPC812 ARM Cortex M0+ 32-bit MCU
- Texas Instruments TPS65158 High Resolution LCD Bias IC for TV
With special love, Apple secured the hinge guard to keep the MacBook from falling in half. The same protection plays the role of an antenna. As for the loop operation: the spring mechanism twists the cable when the display is closed, and unwinds when it is opened. That is why the lid began to close easier.

The hinges are a demonstration of injection molding technology: they are thin, light and strong.

And here is the second generation of the keyboard "butterfly" in all its glory. Differences include taller keycaps for more comfortable keystrokes and a dome mechanism for improved stability compared to regular MacBooks. 
iFixit deservedly awarded the new MacBook Pro 13″ without Touch Bar a 2 out of 10 on the repairability scale, delighted only with the easily detachable trackpad. The biggest issues were the amount of glue around the battery, the Pentalob screws, the RAM soldered to the motherboard, and the non-standard type of PCIe SSDs. In general, tuning new "firmware" is problematic, expensive and by no means safe.
The need to disassemble the MacBook most often occurs when it breaks down or the device needs to be cleaned. If the MacBook was bought recently and is under warranty, then it is better to use the services of a service center to perform the operation, however, if the manufacturer's warranty obligations expire, it is much cheaper and more profitable to repair an expensive MacBook on your own. It is worth noting that if the device is under warranty, even one unscrewed screw on the device case can deprive the consumer of privileges. Take this very carefully so that there are no problems with the manufacturer in the future.
If you need to take your Mac apart for cleaning or repair, we'll show you how.
Although Apple's MacBook is considered a unique development in computer technology, it has a stylish design, is characterized by a very thin and original look, an ordinary person who has even little knowledge of the technological features of devices can disassemble and clean it.
As people say, the eyes are afraid, but the hands are doing. At first glance, it’s even scary to touch a fragile and delicate device once again without a visible need for it. However, like any other computer equipment, Apple MacBooks are disassembled using a set of tools and repair tools. The only difference is the need to purchase special screwdrivers for disassembling computer equipment and a plastic spatula, which is required for accurate disassembly of cases, since the elements in them are characterized by miniaturization.
Despite the number of Macbook models manufactured by Apple, the technology for disassembling devices is practically the same, only elementary differences are different in the form of the number of bolts, their location and configuration.
Consider the technology of disassembling devices using the example of popular laptop models MacBook Pro and MacBook Air, 2006 and 2008, respectively, which are prominent representatives of the sixth and fifth generations of the line.

How to disassemble MacBook Pro 13
To disassemble the MacBook Pro 13, you must begin by dismantling the bottom panel of the laptop. To do this, turn the device upside down and unscrew the eight miniature screws that hold it.
After removing the cover, the owner will open the internal contents of his MacBook. Next you need to pull out the battery, to remove which you will need to unscrew two more screws. To remove them, you need an unusual screwdriver with three edges. After that, you can pull out the battery, after disconnecting the connector from the motherboard.
In order to dismantle and clean the fan, you must first remove the optical drive. Next, you need to unscrew the three screws that hold the fan in the MacBook Pro case with a regular screwdriver, after disconnecting the wire that goes from the fan to the laptop motherboard. The fan needs to be cleaned very carefully before being installed back.
Next, you need to disconnect the wire that goes from the monitor to the board and unscrew the seven screws that secure the motherboard, and two to disconnect the external battery connector. It is not required to dismantle the RAM to clean the laptop, so there is no point in removing it.
Further, in order to completely disassemble the MacBook Pro 13, you will need to disconnect the cables that go to the touchpad and keyboard, as well as disconnect the battery indicator. Additionally, you will have to dismantle the plastic fastener of the signal cable from the display and remove the microphone, which is located in a special recessed socket. After the operations performed, you can carefully and effortlessly pull out the MacBook Pro 13 motherboard. The laptop radiator and the remaining elements of the cooling system are dismantled along with the board. Turning the board over, you can see the radiator itself. Disconnect it from the common unit by unscrewing the four screws.

Assembly is carried out in reverse order.
On this disassembly of the laptop can be considered complete. It remains only to clean all the elements of the system, replace the parts that have become unusable, if any, and assemble everything in the reverse order. Experts also advise before assembling the MacBook Pro to work out the standard places with special thermal paste, which has a positive effect on the laptop cooling system and on the life of the block parts.
How to disassemble a MacBook Air
As already mentioned, disassembling different models of Apple laptops does not have significant differences. To disassemble the Macbook Air, as in the previous case, you must begin by removing the back panel of the device. To do this, the owner will need a rare five-sided screwdriver, with which it will be possible to unscrew the eight mounting screws.
Despite the significant similarity of the models under consideration, the internal space of the modules differs significantly. Most of the case space is occupied by a super-thin battery, which must be removed by unscrewing a few screws with the same five-blade screwdriver.
The next step is to remove the speakers. The MacBook Air is equipped with powerful speakers, which must be removed using a special plastic spatula designed to work with very sensitive microelements and microcircuits.
Next, you need to sequentially dismantle the fan, microphone, motherboard and radiator of the laptop cooling system. Disassembling the MacBook Air is easy, the activity is similar to the previous option. The only difference is the need for a torx screwdriver - without it, unscrewing the mounting screws on a laptop is almost impossible.
After cleaning the boards, the laptop cooling elements and the fan, all the parts of the module are assembled in the reverse order. Assembling, as well as disassembling a laptop, is not particularly difficult, the main thing is to take the work responsibly, not to lose small parts and screws during maintenance work. For this, specialists very often use magnetic boards. When folding small metal elements on such a board, they will not get lost around the room.
After assembly, it remains only to check the functionality of the device. If the work was done correctly, all the elements are securely installed in their original places, then the laptop will function without hitches and malfunctions.
Summing up
Experts advise to carry out preventive cleaning of the MacBook at least once a year. With contamination of the cooling system and internal microcircuits, the MacBook begins to overheat regularly, slow down and even freeze. And if during the warranty period for this procedure it is enough just to contact the service center and professionals will do everything for you, then after the end of the warranty period for such services you will have to pay a tidy sum from your pocket.
Following the recommendations in this article, a person who is related to technology and understands the technology of the functioning of the system elements will be able to independently, without the help of specialists, cope with the task, disassemble the device and perform preventive cleaning of the MacBook. Most importantly, take the work responsibly - and you will succeed.
A couple of weeks ago, iFixit gave a brand new Apple MacBook Pro laptop in the version without the Touch Bar panel and gave it only two points out of ten for maintainability. The turn of the modification came with the same 13-inch display, but with the Touch Bar panel.
Looking ahead, its maintainability is even worse.
Opening the bottom cover, which is easy to do, if you do not take into account the need for a special screwdriver for Pentalobe screws, you can immediately see that two identical versions of the MacBook Pro are significantly different inside.

At a minimum, the current hero of the news has two cooling system fans versus one for the younger model, and they look different.

In addition, you can find a connector on the system board to which nothing is connected. And it is also covered with a cap. Since it would be foolish to assume that the robots at the factory forgot to connect something, we can call this connector an engineering or test connector.


The motherboard looks unusual, like a blank for VR goggles or a small child trying to draw a car. Be that as it may, the board contains an Intel Core i5-6267U processor, an Intel JHL6540 Thunderbolt 3 controller, SanDisk SDRQKBDC4 064G flash memory chips, Samsung K4E6E304EB-EGCE RAM chips, a Murata / Apple 339S00056 Wi-Fi module, an APL1023 343S00137 chip (Apple T1), which is responsible for the fingerprint scanner, Cirrus Logic CS42L83A audio codec and other components.

USB-C ports can still be replaced in case of damage, which is important in view of the lack of a separate port for charging.
Another interesting feature is the sham speaker grilles in a sense. As you can see in the photo, the emitters themselves are located in a completely different place.
Specialists simply could not dismantle the Touch Bar touch panel. A large amount of glue and the shape of the panel played a cruel joke - the touch part separated from the main part of the screen. So it is better for users not to damage this part of the laptop, because it will most likely not be possible to replace it. The Broadcom BCM5976TC1KUB60G controller is responsible for the operation of the panel.
The battery capacity of the laptop in question is 49.2 Wh, while the more affordable version has a battery with a capacity of 54.5 Wh.

As a result, the device earned only one point for the fact that the touchpad can be dismantled without disassembling the laptop completely. The disadvantages of the new product were branded screws, an abundance of glue, a processor, RAM and SSD soldered into the motherboard, the inability to replace the Touch Bar and, interestingly, a fingerprint scanner. The fact is that, as in iPhone smartphones, the fingerprint scanner is “tied” to a specific processor in a specific device. In this case, to the Apple T1 chip. And if the fingerprint scanner on the new MacBook Pro, which also acts as a power button, is broken, this will most likely lead to the need to replace the entire motherboard or even buy a new laptop, which is more likely.
All news for today
- 08:35 Key Samsung plant on fire. The fire was extinguished by morning
- 08:26 Xiaomi smart TVs will soon have another competitor. All smartphone manufacturers want to produce smart TVs
- 08:06 Meizu 17 received a completely different camera than expected. A new image has appeared
- 07:47 Redmi Note 9 Pro Max received a new design. The published image contains not only the slogan ProCamerasMaxPerformance, but also the silhouette of the new smartphone
- 03:23
Fair, not too high or too low. There should be prices on the Service website. Necessarily! without "asterisks", clear and detailed, where it is technically possible - the most accurate, final.
If spare parts are available, up to 85% percent of complex repairs can be completed in 1-2 days. Modular repairs take much less time. The site indicates the approximate duration of any repair.
Warranty and Liability
A warranty should be given for any repair. Everything is described on the site and in the documents. A guarantee is self-confidence and respect for you. A 3-6 month warranty is good and enough. It is needed to check the quality and hidden defects that cannot be detected immediately. You see honest and realistic terms (not 3 years), you can be sure that you will be helped.
Half the success in Apple repair is the quality and reliability of spare parts, so a good service works directly with suppliers, there are always several reliable channels and a warehouse with proven spare parts for current models so that you do not have to waste extra time.
Free diagnostics
This is very important and has already become a rule of good form for the service center. Diagnosis is the most difficult and important part of the repair, but you should not pay a dime for it, even if you do not repair the device after it.
Service repair and delivery
A good service values your time, so it offers free shipping. And for the same reason, repairs are carried out only in the workshop of the service center: it can be done correctly and according to technology only at a prepared place.
Convenient schedule
If the Service works for you, and not for itself, then it is always open! absolutely. The schedule should be convenient in order to be in time before and after work. Good service works on weekends and holidays. We are waiting for you and working on your devices every day: 9:00 - 21:00
The reputation of professionals consists of several points
Age and experience of the company
Reliable and experienced service is known for a long time.
If a company has been on the market for many years, and it has managed to establish itself as an expert, they turn to it, write about it, recommend it. We know what we are talking about, since 98% of incoming devices in the SC are restored.
We are trusted and passed on complex cases to other service centers.
How many masters in the directions
If you are always waiting for several engineers for each type of equipment, you can be sure:
1. there will be no queue (or it will be minimal) - your device will be taken care of immediately.
2. You give Macbook repair to an expert specifically in the field of Mac repairs. He knows all the secrets of these devices
technical literacy
If you ask a question, the specialist must answer it as accurately as possible.
To give you an idea of what you need.
Will try to solve the problem. In most cases, from the description, you can understand what happened and how to fix the problem.
A detailed guide for those who dare.
The life cycle of Apple laptops is significantly longer than that of competitors. It's hard to argue with this, especially when it comes to models released 3-4 years ago and earlier. A maximum of aluminum, well-thought-out ergonomics, the location of all elements - these are the devices that look at us from store shelves.

And somewhere in a parallel dimension, there are plastic heavyweights with controversial designs, creepy accessories, but a more loyal price tag.

Now the situation has leveled off. Brands competing with Apple have also learned to make beautiful things, and there are a number of parameters in which some laptop models even surpass the “reference MacBooks”.
But any technique sooner or later requires prevention. It's my turn to do the same.
Why did I decide
Note. I deliberately left the technical part of the question, terminology and aesthetics of service centers outside of this article. For any of us, results matter.
I have top 13" MacBook Air 2011. Five years ago, it was a “beast machine”, the processor of which (and here i7 1.8 GHz) grinds any load to smithereens. 4 GB RAM- then it was still a logical standard, and today it is enough for all everyday tasks.

The previous owner treated this "workhorse" with due trepidation, and for the last two years I have been exploiting it "to the tail and mane". During this time, the MacBook was opened once, by me. After removing a layer of dust from the cooler area (we all like to work on our knees and soft pillows), the laptop was safely closed, but it didn’t last long.
Problem 1: Frying pan with an industrial fan
In my usual work mode, OS X has about a dozen different applications running, including: a text editor, Photoshop, the Safari browser interspersed with Opera (each with 10-15 tabs), mail, five instant messengers, iTunes, a couple of Finder windows. All this works relatively stably for the first half hour. And then the real hell begins.
The cooler spins up to the maximum (which is a good 6500 rpm), the keyboard warms up to a temperature that causes discomfort in operation. Applications begin to play with the matrix and react with an annoying delay ... It started to infuriate - it's impossible to work like that!
For the sake of practical interest, I install the application iStat Menus[Download] and with surprise I observe the following picture.

In the screenshot above, the temperature reaches 96 degrees. Let me remind you that at this moment I am not doing video editing or processing heavy files. At the moment of such a load, the temperature value crossed the mark in 105 degrees.
What is the risk? Too high a temperature can cause failure of any of the elements on the laptop board. The logical degradation of components begins: capacitors, resistors, crystals, and sooner or later you will simply face the premature death of the MacBook.
Repairing or replacing a motherboard is not cheap, so I strongly recommend periodically checking the temperature using the above utility.
Problem 2: I will tell you how to kill the battery
Working behind a large monitor is much more pleasant. Many windows fit, you can effectively arrange the workspace, the realistic colors of a decent matrix delight (the era of CRT is already in the distant past) and your eyes are not so tired. Normal people buy Mac Mini or Mac Pro for this purpose. Our man - connects a laptop via Display / Thunderbolt Port, complements this with a proprietary Apple Keyboard and Magic Trackpad, and feels like a "winner in life."
To whom I refer, I think you already understood. 24 hours a day, the MacBook sits on my desktop, never turns off (thanks to its minimal power consumption), and is connected to the network adapter all this time.
After the purchase, my MacBook Air already boasted three hours of battery life. Six months of operation in the "system unit" mode and the battery life was reduced to 40 minutes, and the number charge cycles exceeded 650. You can see it in the menu About This Mac -> System Report -> Number of Recharge Cycles.

On the official website of Apple, the guarantee for preservation is indicated. 80% capacity after 1000 charge cycles, but, apparently, the company's engineers mean a more adequate operation option.
Detailed instructions for those who dare.
Do not repeat my mistakes and treat your Mac battery with care. How to do this I will tell below.
What is the risk? You feel constantly tied to the outlet, and the question: “Do you have a laptop” is simply difficult to answer.
Verdict. It's decided - it's time for general prevention. The first item on the list is cpu thermal paste replacement with all the resulting dust eliminations. Second - battery replacement.
Service center? No, I'm on my own
The computer services industry is well developed today. One call and a representative of the service center will come for your Mac, pick it up himself, then within a day they will do a “full maintenance” and deliver it back. There are a lot of scenario options here and you can always find a company or specialist who will make your MacBook “like new”. The question is, how good is it?

Yes, many do just that - they took it to the center and let them figure it out. I, as a person who is interested in technology, technology, and especially everything related to Apple, became interested in do it all on your own.
My readers will now be divided into two groups: those who say: “Yes, what is the heroism here - an hour of work and everything is ready” and those who twist at the temple with the words: “Well, come on, you’ll still do it crookedly. We need a specialist in this matter." I think there is a third category that will support my desire to climb where it is not supposed to.
Buying a battery and thermal paste
So I need new battery for MacBook Air 13'' 2011 and thermal paste. In addition to rumors and beliefs that fakes are everywhere, and the original does not exist (and there is some truth in this), I have nothing to present to the market in the battery issue. With thermal paste, everything is solved easier and according to the principle “so help me forums”.
The first and most important thing is to find out which battery model installed specifically in your MacBook. Information can be easily found on the Internet, indicating the exact model name and year of manufacture (do not forget about the screen size), but it is best to see the required serial number with your own eyes.
In order to open the MacBook, we need a non-standard (for other household appliances) screwdriver format Torx T5 or "asterisk".

Ideally, you need to have two screwdrivers at once: T5 to open the laptop lid and T4 to remove the internal screws that hold the battery, cooler, and heatsink in place. So the fixing screws will not experience wear from an unsuitable screwdriver format.
Using a T5 screwdriver, carefully remove the 10 screws:

The 2 top center screws are longer than the 8 others - keep this in mind when reassembling.
Now we define the battery model.

The 2011 MacBook Air 13'' has a battery number A1405. And then it's a matter of technology - look for the most suitable store on the Internet and order the model you need. Finding "100% original" is more like a myth, so take the Chinese markings and characters on the battery calmly. In the end, and your MacBook proudly bears the inscription on the back of the case: Made in China.
Regarding the thermal paste. There are many good options on the market:
- Glacial Stars Ice Therm I
- Arctic Cooling MX–2
- DEEPCOOL Z3
- Arctic Silver Ceramique 2
- CoolerMaster IC Essential E1
- KPT-8 in the end - it is quite good
If you wish, you can do a detailed analysis of the effectiveness of each of the above pastes. Personally, I didn’t have time for a thorough study - the work stopped, and the open Mac was waiting for the operation.
My choice fell on CoolerMaster IC Essential E1 for several reasons at once. Firstly, it is a little cheaper than the hyped Zalman, and secondly, according to numerous reviews, it does an excellent job of cooling.

Finally, you buy a complete set for laying the paste yourself: the tube itself with the “saving substance”, an alcohol wipe and a spatula for leveling the paste layer on the processor. The issue price is about 600 rubles, but the volume of the tube is enough for a dozen or two processors.
We change the battery
Everything you need for prevention is on hand. Torx T4/T5 screwdriver, new battery, thermal paste, hands and full focus.

The only thing that is not in the photo is a wooden stick or toothpick to turn off the trains. In no case do not use a metal screwdriver for this.
Immediately before starting work disconnect the cable leading to the battery.

We unscrew the screws around the perimeter of the battery. Do not be too lazy to take an A4 sheet and schematically sketch the location of each screw. They have different lengths and threads, and when reassembling there is a risk of screwing something in the wrong place, thereby piercing the body of the device.
I did like this:

For disassembly, you need to unscrew exactly five screws, using a Torx T4 screwdriver.


When removing the battery, be extremely careful and try to hold it from all sides at once. The battery may break under its own weight.
The original and the newly acquired "100% original" are no different from each other.


The only thing that catches your eye is the absence of a plastic tail for extraction on the purchased battery.

It's not critical, we'll survive.
We install a new battery in place and fix it with screws, according to our scheme. Each screw has its place. Try not to apply force, a moderate turn of the screwdriver is enough.
After installing the battery loop is not connected, because ahead is the most time-consuming part of the prevention - the replacement of thermal paste.
Change thermal paste
Using a toothpick, carefully pry off the ribbon cable located above the cooler. It is glued to the body of the cooler, so it will take a little effort to tear it off.

Again, use a toothpick to turn off the miniature cooler cable by gently lifting the tab and pulling it out.

Now, using the same Torx T4 screwdriver, unscrew the three screws holding the cooler and carefully remove it.

We proceed to the removal of the radiator. There are already four screws waiting for us. Try to remember the effort that you had to make to break them - when reassembling, you will need to tighten the screws in the same way.

After you unscrew the 4 screws, do not remove the radiator. It is fixed in one more and very problematic part.
Near the cooler, in the very corner, there is dangerous zone- a miniature wiring, under which there is a screw fixing the cooler.

Carefully move the wire aside and remove the screw. The main thing is not to damage anything. Remove the radiator by loosening from side to side and releasing the rubber seal.
While unscrewing the screws, make another schematic drawing with their location. It is important! The screws are different.

Using a can of compressed air or a syringe, get rid of the dust that has formed on the radiator grill. Of course, the same should be done with the cooler.
Access to the processor chip is guaranteed!
Yes, what was left of the factory thermal paste could not save the MacBook from overheating. It has dried out and does not provide proper thermal dissipation.


Using a cotton pad and alcohol, carefully wipe the processor (to a mirror finish) and the heatsink.

We have come to the most crucial moment - applying thermal paste. Faced with the self-replacement of the paste, many users are faced with the problem: what is the optimal amount of thermal paste to apply?
In order to understand why thermal paste is needed at all, look at this picture:

The purpose of replacing thermal paste is to provide smoothing and filling of microcracks on the surface of the processor and heatsink. She is not needed to be a layer between them. Therefore, with the approach: “I’ll put more - I’ll cool better” you will only make it worse. The thermal paste will dry out very quickly and cease to perform its function, losing the necessary physical properties.
You need to distribute the paste in a thin layer over the entire surface of the processor. Approximately this amount:

Then, using a spatula, level the thermal paste.


When everything is ready, do not rush to immediately apply the radiator. Try on its location and pay special attention to the rubber seal. It should fit into the motherboard slot.

Only then can you properly install the radiator. Be careful when screwing in the corner screw (where the dangerous wire is). Don't overtighten the screws, do it gradually on each side.
When installing the battery, make sure that the barely visible slot on the plug snaps into place.

We close the back metal cover, tighten ten screws around the perimeter.
Assembly completed!
The effect of replacing thermal paste, battery and some tips
Having done everything that I described above, I independently performed the preventive maintenance of my beloved MacBook Air. But the question that worried me even before starting all this was the effectiveness of the event.
I'm telling.
Thermal paste. Before replacing the thermal paste, the temperature of the laptop rarely dropped below 95-100 degrees. The cooler worked at full capacity even when applications were refused, and the temperature to which the case heated up made it impossible to work.
You type text in the editor - 92-94 degrees, launch Safari - all the same. You open Final Cut - the mark of 105 degrees submits. The cooler works, but there is no sense from it. He didn't chill!
Replacing the thermal paste and cleaning the cooler worked magically. He stopped making noise! When you run heavy applications, the MacBook instantly heats up, the cooler slowly spins up and falls within a minute. And the temperatures now look like this:
- Working in Final Cut Pro X (video editing) - 94-97 degrees
- Surfing, music, instant messengers, Photoshop - 70-80 degrees
- Working in a text editor - 40-45 degrees.
The temperature in the room is a hot summer day, about 23-25 degrees.

I have NEVER seen the last figure on my MacBook Air. Working in complete silence is a real pleasure. Nothing distracts you, does not pester and does not annoy. Was the game worth the candle? Definitely!
Battery. 40 minutes is the maximum I could afford without an outlet. After switching on, the new battery was 52% charged. We all have heard about the calibration, which is associated with constant disputes and speculation.
Battery calibration IS NEEDED. Of course, if you are interested in her adequate further work. What I did after the first inclusion:
- Immediately connected the power adapter and charged the battery to 100%
- Discharged to 10% and re-charged to 100%
- Repeated the cycle 3 times
That's all, that's enough. Don't be surprised if the program iStat Menu will constantly show different battery capacity and health values. This is normal until the battery is pumped, which may take about 20-25 discharge / charge cycles.
When using the battery, try to work in the 20-100% mode. Don't let your battery drain completely, and stop working after your Mac prompts you to critical charge. Try to take your MacBook off immediately after it is 100% charged. This way you won't have to worry about battery life and battery degradation for years.
Of course, this is just a recommendation. Modern batteries (and even more so from Apple) are equipped with the necessary protection controllers and provide maximum service life without unnecessary “dancing with a tambourine”. Apple technology is designed for comfort, and it's up to you to follow the operating tips or not.

At the time of finishing this article, my Mac promises to work for another 4 hours and 15 minutes. The number of full charge cycles is 7. The temperature indicator is 46 degrees (I work on my knees). The cooler rotates at a minimum of 2000 rpm, but it seems that it does not work at all.
(4.75 out of 5 rated: 4 )
![]()