Computer mouse repair - my computer - article directory - iaisite (moy-testsite). How to fix a computer mouse without professional knowledge and experience? Do-it-yourself computer mouse repair
Computer mouse Probably everyone knows what it is. This is a manipulator or coordinate input device for controlling the cursor and issuing various commands to the computer. Over time, this device has various malfunctions: damage to the stranded wire, the sensor often malfunctions, the mouse wheel (scroll) sometimes scrolls, the mouse buttons do not work, etc.
Let's take a look at do-it-yourself repair of the most popular computer manipulator - a mouse!
The mouse is technically a fairly simple device, so it is quite easy to repair with your own hands. If you know how to handle a soldering iron even a little, then this will allow you to fix almost any mouse breakdown. However, even if you are not friends with a soldering iron, you can fix some typical mouse damage with a minimum set of tools:
Crosshead screwdriver
Pliers
Scissors
The main malfunctions of computer mice
Now there are several types of computer mice that differ in the principle of operation (roller, optical or laser), the number of buttons (from 3 and above), as well as the type of connection (PS / 2, USB or wireless (with a USB adapter)). However, the most common are optical ones with a USB or PS / 2 connection.
Such mice are relatively inexpensive (not much more expensive than roller mice, but much cheaper than laser ones) and at the same time they have a sufficiently high accuracy, which is enough for most users.
| Np.p. |
Description of the problem |
Possible malfunction |
|---|---|---|
| 1 | Mouse not responding at all | Breakage or chafing of wires; violation of the integrity of the printed circuit board; controller failure |
| 2 | The sensor is junk. Cursor jumps or jerks | Clogging of the optical sensor; LED failure |
| 3 | The scroll wheel does not work or the scroll area moves in jerks when scrolling | Loosening of the scrolling mechanism; drying of the lubricant inside the mechanism; encoder defects (scroll sensor) |
| 4 | A specific button gets stuck or double clicked | loosening; failure of the button mechanism; mouse settings or driver problem |
| 5 | Specific mouse button not working | Failure of the button mechanism |
Disassembly and device of the mouse
We usually disassemble the mouse using a small Phillips screwdriver. To do this, turn the mouse upside down, find and unscrew one or more screws that hold it together. If the screws are not visible, then they are most often hidden under stickers or stand-legs:

Usually the screws hold the mouse only in the back. The front part (where the buttons are), most often, is fixed due to special grooves. To remove the top cover from these grooves, you need to slightly lift it by the freed back and slowly pull it towards you. You can put a little more pressure on it from the front, but the main thing is not to be very hard, otherwise you will break it! The grooves on the top cover of the mouse and the pins that held them:

When you remove the top cover, you will find a small printed circuit board under it, which is usually fixed only on small plastic pins (although it may be screwed to the case). Wires (if the mouse is wired), buttons, a scrolling mechanism, as well as a complex of a backlight LED and a sensitive optical sensor will be soldered to this board:

To completely disassemble the mouse, we need to remove the printed circuit board from it and disconnect the scroll wheel (it can be easily pulled out of the encoder grooves).
Checking and repairing the wire
Most often, when connected to a computer, the mouse either does not work at all, or the cursor twitches or disappears if one of the wires frays or breaks somewhere (unless, of course, the mouse is wired).
A typical optical mouse usually has 4 to 6 different colored wires. The colors and number of wires depend on the specific manufacturer, however, there is also a standard:

Mouse wiring color scheme
Nutrition- red (other options: golden, orange, blue, white).
Data reception- white (other options: blue, orange, yellow, green).
Data transfer- green (other options: golden blue, yellow, red, blue).
Land- black (other options: golden green, green, white, blue).
You can clearly judge the correct wiring by looking at the letter marking of the wires in the place where they are soldered to the printed circuit board (unless, of course, they are torn off the board). Breakage and chafing of wires most often occurs in places where the wire is bent at the exit from the mouse body. You can indirectly check for a break by pulling out the wire and trying to bend it in doubtful places (it will be easier to bend at the break). However, in order to judge for sure, you will have to remove the insulation by carefully cutting it with a blade.
Having found the place where the wiring is broken, you need to restore their integrity by soldering or twisting. Photo of the finished twist, how it should look:

After splicing the wires, insulate them from each other with electrical tape or tape. You can try. In order not to burn the port, you need to connect or disconnect the mouse when the computer is turned off! To eliminate all doubts with a break, try ringing all the contacts of the USB (or PS / 2) plug with a multimeter. After the repair, the mouse should work.
Optical mouse sensor not working
Often there is also a situation where we can not precisely point the cursor at a certain point. It constantly trembles and moves by itself. This situation clearly indicates clogging of the optical group of the mouse. The blockage is most often external. Dust or hair gets into the compartment where the light of the diode is reflected from the table.
To get rid of such a blockage, you do not even need to disassemble the mouse. It is enough to turn it over and blow it. As a last resort, use a small brush to remove stubborn debris.
If, after such manipulations, the mouse cursor trembles, then, most likely, either the sensor is clogged inside or is completely out of order.
In any case, you can try to disassemble the mouse and clean the sensor with a toothpick with a cotton swab soaked in alcohol wrapped around it:

Before cleaning the sensor with a cotton swab, you can also try blowing it to blow out fine dust that can stick when wet. After that, gently, without pressure, insert the toothpick with rotational movements into the sensor hole. After making a couple of turns and without stopping to rotate, we take out the toothpick, wait for the alcohol to dry and try to connect the mouse.
If after all cleaning attempts the sensor does not work normally, then if you have another mouse, a soldering iron and straight arms, you can unsolder the non-working microcircuit and replace it with a sensor from another mouse.
Scrolling mouse wheel
It happens that the mouse works fine, but when we try to use its wheel, the page we are scrolling starts jumping up and down, or does not want to scroll at all. Alas, the failure of the mouse wheel is a fairly common failure, and it was she who prompted me to write this article. First you need to carefully consider how evenly the wheel spins in the groove. The groove itself and the wheel axle have a hexagonal section, but sometimes one or more sides of this hexagon can be deformed, as a result of which the axle will slip in a problem area.
If you have just such a problem, then it is solved by sealing the edge of the wheel axle with tape or electrical tape in small quantities. If everything is fine with the movement of the wheel, then the breakdown occurred inside the encoder (scroll sensor). From prolonged use, it could become loose and should be slightly compacted:

To do this, take small pliers and, in turn, press them on the four metal brackets that secure the encoder to the plastic parts of the scroll mechanism. The main thing here is not to overdo it and not break the fragile plastic, but at the same time tighten it harder. Try connecting a mouse and see if the negative scrolling effect is reduced after each press.
There are several more options:
Disassemble and clean the mechanism
Replace the mechanism with another mouse (with a different malfunction)
Mouse buttons not working
Each button has its own click resource. Usually the contact at the left mouse button disappears. The mouse has several buttons: left, right and under the wheel. They are all usually the same. A non-working button is almost never repaired, but it can be replaced from another mouse.

The microswitch has three "legs", the first of which is free, and the other two are contacts that need to be soldered. Sometimes the button still works, but it does not work every time it is pressed. Such a symptom may signal that the edge of the button pusher, which presses the microswitch, or poor contact inside the contact plate switch, has worn off from frequent use.
We disassemble the mouse and carefully study the problematic button and its pusher. If we see a small dent, then the problem may be precisely in it. It is enough to fill the washed place with a drop of epoxy or melted plastic. At the same time, while the switch was disassembled, you can clean the contact group.
The last problem that you may encounter is that the mouse button double-clicks when you click on it - the so-called contact bounce. You can solve this case by soldering the microswitch or ... programmatically!
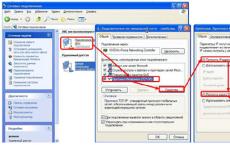
In any case, before taking up the soldering iron, check that the mouse settings are correct in the Windows Control Panel:

By default, the double-click speed slider should be centered, and the sticky mouse buttons option should be disabled. Try to set these parameters and check if the problem is solved. If not, another radical programmatic way to "cure" a double click is to remove the mouse driver.
Mice- one of the most actively used computer devices. Therefore, it is not surprising that they often fail. However, due to the simplicity of their device, in most cases everyone can fix the mouse! To do this, it is not necessary to be able to solder or understand electronics.
The main thing is to clearly diagnose the cause of the breakdown. Here, as in medicine, the correct diagnosis is the path to a successful repair. I hope our article will allow you to determine what exactly is broken in your mouse, and therefore, to fix the breakdown.
Good luck with your repair!
We remind you that you can order in one of the corresponding ones from our catalog .
Good afternoon friends!
Today we will talk about one very convenient device that we are so used to and without which we can no longer imagine working on a computer.
What is a "mouse"?
"Mouse" is a button manipulator, designed together with the keyboard to enter information into .
Indeed, he looks like a mouse with a tail. A modern computer is already unthinkable without this contraption.
The "mouse" is much more convenient to use than, for example, the built-in laptop manipulator.
Therefore, users often turn off this laptop “mat” and connect a “mouse”.
How does this handy thing work?
The first designs of manipulators
![]() The first manipulators included a ball that touched two disc rollers.
The first manipulators included a ball that touched two disc rollers.
The outer rim of each disc had perforation. The shafts were located perpendicular to each other.
One shaft was responsible for the X coordinate (horizontal movement), the other for the Y coordinate (vertical movement).
When moving the manipulator on the table, the ball rotated, transferring torque to the shafts.
If the manipulator was moved in the “right-left” direction, then the shaft responsible for the X coordinate rotated mainly. The cursor on the monitor screen also moved to the right-left. If the mouse moved in the direction “toward-away from itself”, the shaft responsible for the Y coordinate rotated mainly. The cursor on the monitor screen moved up and down.
If the manipulator was moved in an arbitrary direction, both shafts rotated, and the cursor moved accordingly.
Optical sensors in old mice
Such devices contained two optical sensors - optocouplers. The optocoupler includes an emitter (LED emitting in the IR range) and a receiver - (photodiode or phototransistor). The emitter and receiver are located at a close distance from each other.When the manipulator moves, the shafts with discs rigidly fixed to them rotate. The perforated edge of the disc periodically crosses the radiation flux from the emitter to the receiver. As a result, a series of pulses is obtained at the output of the receiver, which is fed to the controller chip. The faster the mouse moves, the faster the shafts will rotate. There will be a higher frequency of pulses, and the cursor will move faster on the monitor screen.
Buttons and scroll wheel
 Any manipulator has at least two buttons.
Double “clicking” (pressing) on one of them (usually the left one) starts the execution of a program or file, clicking on the other one launches a context menu for the corresponding situation.
Devices designed for computer games may have 5-8 buttons.
By clicking on one of them, you can shoot at the monster from a grenade launcher, on the other - to launch a rocket, on the third - to discharge a good old hard drive into it.
Modern mice also have scroll - a scroll wheel, which is very convenient when viewing a large document. You can view such a document only by turning the wheel and not using the buttons. Some models have two wheels scrolling, while you can view text or a graphic image by moving both up and down, and left and right.
There is usually another button below the scroll wheel. If you view the document by rotating the wheel and simultaneously press it, the manipulator driver activates such a mode that the document itself begins to move up the screen. The speed of movement depends on the speed with which the user rotated the wheel before pressing it.
In this mode, the cursor changes its style. This further increases the convenience ... In short, they got it, cooked it, chewed it, it remains only to swallow it. Pressing the wheel again switches from "auto view" to normal mode.
Optical mice
 In the future, the manipulator was improved.
So-called optical "mice" appeared.
Such devices contain emitting Light-emitting diode(usually red), a transparent reflective plastic prism, a light sensor and a control controller.
The LED emits rays that are reflected from the surface and captured by the sensor.
When the manipulator moves, the received radiation flux changes, which is captured by the sensor and transmitted to the controller, which generates standard signals for a specific interface. Optical mouse more sensitive to movement and does not require a mat for itself, like the old ball manipulator.
In an optical mouse, there are no rubbing parts (with the exception of the potentiometer, the rotation of which is transmitted from the scroll wheel), which wear out or become dirty. This is also an advantage.
Possible problems with manipulators
The mouse, like any technique, has a limited lifespan. It's no secret that the bulk of computer technology is made in China. The goal of any business is profit, so the Chinese comrades save even on cables for mice, making them as thin as possible.
 Therefore, the first weak point of the manipulators is the cable.
Most often internal cliff one or more cores happens at the point where the cable enters the mouse.
The cable has 4 wires, two of them are power, the third is the clock frequency, the fourth is information.
If the mouse is not seen by the computer, the first step is to "call" the cable.
If a break is detected, cut off a part of the cable with a connector (behind the cable entry point into the “mouse” case closer to the connector) and the remaining piece to the manipulator printed circuit board, observing, of course, the colors.
PS/2 mice can't switch on the go .
Otherwise, her controller (her tiny "brain") may fail. And it's good if it's limited to just that. The PS / 2 interface controller on the motherboard may also fail, which is much worse.
If the cable is intact, and the mouse is not recognized by the controller, then, most likely, its controller has failed, and it must be replaced. A cable break in optical mice can also be suspected by the absence of a glow of the LED (which is located near the surface that rides on the table). In other cases, the glow may not be due to a malfunction of the LED or controller, but this is rare.
Manipulators with COM or USB interface can switch on the go. However, at present, devices with a COM interface are practically not found.
You have to “click” the mouse many thousands of times, and the buttons may fail after a long time. To replace the button, you need to disassemble the manipulator and solder another one. It is not necessary to use the same one as it was. The main thing here is to respect the height in order to maintain the length of the key travel. However, manipulators have long been very affordable, and most users do not bother with their repair.
Let's say "thank you" to the good old "mice" with a ball in their belly - they have served us well ...
Finishing the article, we note that there are varieties of manipulators with laser emitter instead of an LED, which provide more accurate and faster cursor positioning. This speed and accuracy is especially demanded in games.
There are also wireless (radio) "mice", in which the exchange of information with the computer is carried out not by wire, but by radio channel. Therefore, they contain their own power source - a pair of finger-type galvanic cells of AA or AAA size. Recall once again that the manipulator connector is inserted into one of the ports.
That's all for today.
Victor Geronda was with you.
See you on the blog!
If the computer mouse breaks , many users do not know how to live on . The session ends and the search for a new device or recovery begins performance broken thing. If you have basic knowledge of electrical engineering and the ability to work with a soldering iron, you can very quickly repair a wireless mouse. Consider a step-by-step method for determining the causes of a device malfunction and restoring its resource. 
Sources of breakdown
In most cases, the cause of the failure will be non-critical because modern laser mice are made from reliable electronic components.
A loss functionality may happen due to:
- damage to the USB connector of the computer;
- poor quality contacts in the power and control parts of the board;
- breakdown of an electronic element;
- breakage of microswitches.
Repair algorithm
Before starting work, remove the wireless module from the computer, set the mouse switch to the “off” position and remove the battery. It would be nice to check the battery right away. If everything is in order with it, then we proceed to repair the mouse.
To determine working capacity USB of the computer is enough to connect a USB flash drive or keyboard to it. If a synchronization signal appears on the monitor screen, it means that the port is in working order. To check the status of a wireless unit with a USB connector, you need to connect to the positive and negative inputs of the plug similar probes of the tester, which is in the diode test mode. If the multimeter displays numbers from 500 - 700 ohms, then the module is working. Of course, this method only indirectly determines the state of the device and does not guarantee one hundred percent confirmation of its serviceability.
In most cases, these steps should help you repair mouse . In the rest - the breakdown will be hidden in microcontroller.
Today I will tell you how to do minor computer mouse repairs. Many of you may ask: why? Indeed, today it is easier to buy a new mouse than to mess with a faulty one and try to repair something there. And in some way you will be right. But there are objects or things that you get used to or become attached to, and their replacement is not always equivalent.
A computer mouse is exactly the subject that you get used to imperceptibly, and the replacement of an old rodent with a new one is immediately felt.
First of all, this is the feeling of the mouse in the palm of your hand, as well as the convenience and strength of pressing the keys. And if you use an expensive mouse that you can’t just buy in a store. In a word, you can always throw out the mouse, but you need to try to give it another life.
To disassemble the mouse, you need to unscrew the screw, which is located in the rear lower part of the case. In my design, you can see that the screw is located under the silicone “leg”. And there are mouse designs where such screws are covered with paper stickers, and the sticker is usually pierced to get to the screw.

With the tip of a screwdriver or scissors, pry off the edge of the leg and peel it off, pulling it to the side. If you have a sticker, then we pierce.

Now we lift the upper part of the case and slightly pull it towards us so that it comes out of the grooves located in front of the base of the case.

In the following figure, the arrows mark some of the elements that are most subject to wear and tear, due to which the mouse starts to work poorly. Basically, these are microswitches and part of the USB cable at the entrance to the mouse body.

2. Faults.
The first common problem is when you move the mouse and the cursor stays in place, jerks, or you have to move the mouse several times to move the cursor. Such a malfunction manifests itself when the USB cable frays at the entrance to the mouse body from repeated bending of the wire.
It is removed simply and easily..
Use scissors or a knife to cut off the damaged section of the USB cable, indicated by the dotted line.

To make it convenient to work, we remove the board from the case. To do this, you need to bend the two latches that secure the board from behind.
We remove the upper insulation of the cable, and clean the ends of the cores. Who has a soldering iron, the ends lived.


Now we connect all the veins of both ends of the USB cable to each other. We take two veins of the corresponding color, for example, red, and twist it, and if there is a soldering iron, then we solder it.
I had heat shrink, and to insulate the connection, I first put it on the ends of the wires. If there is no heat shrink, then you can use electrical tape, tape or any other flexible insulating material.

The next step is to isolate the twists or solderings of the cores, and then evenly lay them in one line to get a large twist. As shown on the bottom of the picture.

Now we cover the twists with insulating material. I used heat shrink again to make it look nice. Although this is not important, because all the same, this beauty will hide inside. But still.

If you solder a little, then there is another option where you do not need to twist or solder. Here, the damaged section of the USB cable is simply cut off, stripped, tinned and soldered under the connector from the side of the tracks. When soldering, the sequence of colors of the wires that go into the top of the connector is repeated.

Second common problem- this is when you have to click the left mouse button several times to perform some action. And it also happens like this: you click once, and the click occurs twice. The reason for all this is the microswitch, which presses the left key.
In this case, we already need a soldering iron. Here we do this: solder the microswitch of the left mouse button and the “wheel”, and swap them. Most people use the wheel only for scrolling through pages, and very few people use it as an additional button. Therefore, we put this microswitch in place of the worn-out left one.
The microswitch is easily soldered, although it has three leads.
With the tip of the soldering iron, we simultaneously touch the middle and any of the extreme conclusions, while trying to lift this edge with our finger. You don't need to press hard.

You should end up with something like this:

Now we intercept and solder the opposite side of the microswitch, where we also lift it with a finger, and heat the two terminals with a sting.

If it didn’t work the first time, that is, the microswitch remained on the board, then we repeat the soldering procedure again: first we solder one side, and then the second. When both microswitches are soldered, swap them and solder back.
Very often situations arise when part of the solder remains in the hole into which the leg of the radio component is inserted.

If necessary, this is eliminated as follows: a regular needle or a needle from a disposable syringe is taken and inserted into the hole from the side of the radio components, and from the side of the tracks this hole is heated with a soldering iron. As the solder warms up, the needle will enter the hole and force the solder out.
Now it only remains to assemble the repaired rodent in reverse order and enjoy its work. When you put on the upper part of the case, first insert it into the grooves and slightly push forward so that it goes all the way.
I think now it will be easy for you to do small computer mouse repairs.
Good luck!
This mouse is very easy to take apart. The whole body is held on by a single screw. Most there are two of them. This mouse is wireless. Includes bluetooth adapter and batteries. The device works like most computer mice from 1.5 volts. But it costs two batteries so that the power is greater and the life is also longer. I unscrewed the screw first and removed the case. There was only a board with radio components and batteries.


At first I couldn't figure it out. But then I decided to change the mechanisms of the buttons in places. As it turned out, another button just stopped working. The whole problem was in the button mechanism. Fortunately, there was another unnecessary computer mouse at home. From it I took the button. Soldered a new one.

Everything seemed to be fine. But when soldering, I damaged the track for connecting the button mechanism. I had to connect the beginning and end of the connection with a wire of short length. Connected and put everything together.