Installation is not possible The disk is in the gpt style. The disk has GPT partition style. Hard disk layout
Having worked on the MBR partition table on the hard drive, the developers decided to pamper us with a practical novelty in the form of the GPT style. It would seem that the advantages of such an innovation are obvious: faster system boot, a more convenient BIOS, support for large external drives. However, despite these advantages, a GPT disk is not suitable for every user. The fact is that installing an OS on such a hard drive without errors is not at all easy. Somewhere in the middle of the process, a notification may suddenly pop up on the screen: Windows cannot be installed on this disk - the GPT partition style is selected.

What's the catch? The fact that the GPT partition has several restrictions on its use. In addition to the fact that activating the operating system on it is very problematic, to work with it you will also need:
- the BIOS installed on the computer in the UEFI version;
- Windows 7/8/8.1 64-bit edition.
Note that if at least one of these parameters is omitted, it will not be possible to get rid of the above error. However, if the motherboard gets along well with UEFI and at the same time you yourself are not averse to installing a 64-bit Windows 7 / 8 system on your PC, then it is not difficult to deal with a problem when installing the system: you just need to set the necessary settings for the GPT partition.
Step #1: Preparing a bootable flash drive
In principle, a GPT partition can be formatted using a standard Windows distribution disk. However, in practice, it is still easier to install and further set up the system using a conventional flash drive. The only thing to consider is its volume. Ideally, it should be at least 8 GB in order not to lose the data we need during the recording process.
In any case, to create a distribution flash drive, you will have to download (copy) the image file from the OS, and then burn it using the command line, UltraISO program, Windows 7 USB / DVD Download Tool or any other utility. You can read about how to do this in detail. Naturally, it is better if Windows is licensed, since in the future there may be a problem with activation.
Step #2: UEFI BIOS Setup
After the bootable USB flash drive is ready, without removing it from the USB port, we restart the computer and when we start it again, by pressing Del or F2 on the keyboard, we enter the UEFI BIOS. Here are 2 possible options.
Method number 1: Simplified BIOS settings
You can use this method when you need to immediately download the distribution and debug GPT partitions.
After the UEFI BIOS menu appears, you need to enter the "Boot Menu" section and set the option to start the system from the installation flash drive in the list of devices that appears:

As a result, the computer will automatically restart and the system will start from the flash drive.
Method #2: Complete UEFI BIOS Debugging
For advanced BIOS settings, once in it, the first thing you need to do is enter the "Advanced" section. You can find it in the lower left side of the open UEFI BIOS window, although simply pressing F7 on the keyboard is enough. Next, you need to open the "Download" menu, select the "USB Support" tab in it and set this parameter to Full Initialization:

The next step - in the same section, select the CSM item and set the Enabled option for it as a launch parameter:

As a result, a window of additional options should appear. You can work with him in accordance with the following plan:
- enter the "Boot Device Options" and set it to "UEFI Only";
- select the item "Boot from storage devices" in the proposed list, register the second option for it from the menu - Both, UEFI first;
- go back by pressing the Back button:

Now in the Boot menu, we need to set the Safe Boot option to Windows UEFI mode. To do this, we enter the appropriate section, click "OS Type" and select the required parameter in the menu presented:

After that, it remains to set the download priority:


Did you complete this step? Let's move on to the next one!
Step #3: Editing a GPT Disk
After the PC boots from the installation flash drive, in order to avoid the appearance of messages from the category “installation is not possible”, “this partition is not suitable” or “GPT style is selected instead of MBR”, when starting the Windows installer, you must open the “Full installation” tab:

It doesn't open right away. When loading a USB flash drive, you will initially need to configure the installation language, then click "Install", and then agree to the terms of the Windows license. Only after that will access to the "Installation type" tab be opened.
One way or another, after selecting the required item, a list of disk partitions will be displayed on the screen. We skip it for now, press Shift + F10 (Shift + Fn + F10) and alternately drive into the command line, alternating with pressing Enter, the following tasks:
- diskpart
- sel dis 0
- clean
- convert gpt
Wherein by replacing the convert gpt command with convert mbr, you can get the disk partition in MBR format(OS activation in it is easier):

In any case, all information from the hard drive will be deleted! Now, after exiting the command line to complete the configuration, we return to the list of sections, click "Update" and select "Next":

As a result, the standard Windows installation starts (details). We are waiting for its completion and moving on.
Step #4: Checking disk information
After successfully installing Windows, it is worth checking the current partition data. In this case, the procedure will be as follows:
- right-click on the "Computer" shortcut on the desktop and select "Manage" from the list;
- in the new window, click the "Disk Management" tab;
- in the list of partitions we find drive C, right-click on it and enter "Properties";
- select the "Volumes" tab and check the information on the section:

If all three steps have been completed without problems before, no surprises should arise.
Step #5: Activate the system from a GPT disk
And the last, perhaps the most heartbreaking moment is the activation of the operating system installed on the GPT disk. It is worth recognizing that often the most problems arise just at this stage. Why? The fact is that activating Windows with GPT without a license key is almost impossible. In this case, you will have to opt for one of the following options:
- format the GPT disk to MBR format (see step #3);
- perform activation using special programs;
- buy a license for the OS;
Ideally, of course, activate the operating system using a license key received from the developer. True, such a pleasure is not cheap, but this is the only way to ensure the full operation of the computer while maintaining the benefits of GPT.
If this is not possible, to activate Windows, you should try your luck with the help of activator programs, for example, KMSPico 10.0.3, or ordinary cracks. Naturally, in this case, you have to act at your own peril and risk. The question arises, is it not more efficient to replace the GPT with the MBR format and forget about the torment with activation? The answer, of course, is different for every user.
When installing Windows 7, 8, 10, quite often users encounter an error: "Installation is not possible, the disk has the GPT partition style." This problem is not so terrible if you know how it can be solved. There are two ways to solve it: converting the style to MBR, installing Windows on the disk in its current state.
Convert GPT to MBR or keep current style
In the case of using a modern and powerful computer that uses UEFI (graphical interface, mouse support, etc.) when visiting the BIOS settings, then the best option is to install Windows on GPT-style. This will allow you to use a drive that has more than 2 TB of memory, as well as get several features that are not available in the MBR style.
For older computers that still use an outdated BIOS with a blue background, it is best to convert the style. By the way, this method may be the only possible one for such equipment. And on such computers, hard drives of more than 2 TB are unlikely to be used, and the number of partitions almost never exceeds four (with MBR-style, it is quite difficult to create more than four partitions).
Installing Windows without changing the GPT style
The problem in question most often occurs when installing Windows 7, but in some cases it can also appear in the eight. To get rid of such an error, two conditions must be met:
- install the 64-bit version (x86 does not fit this style);
- boot in EFI mode.
As a rule, a 64-bit OS is always installed on powerful and modern computers, so the problem most often occurs due to the second point.
1. The first step to take is to check the BIOS settings. To do this, go to the settings (for desktop PCs, you need to press the Del button, for laptops there may be various options - F2, F12, etc., but it is better to read the Enter to Setup phrase on the system boot page and see which button does this).
- in the "BIOS Settings" tab, change the boot option from CSM to UEFI;
- in the “SATA Config” tab, set the “SATA Operation Mode” item to AHCI.
3. Disable Secure Boot if you plan to install Windows 7.
These actions will save you from the error in question as a whole. If you install from a CD, this problem will most likely disappear and not be displayed). If, however, when installing the OS from a bootable flash drive, the problem remains relevant, you need to rewrite the installation flash drive again so that it has UEFI support. Creating a bootable flash drive is possible using one of the many utilities, but it is best to use the command line.
Convert GPT to MBR
If you plan to change the style from GPT to MBR, this can be done during a direct Windows installation. It should be noted that this step is done in cases where you plan to install Windows 7. In addition, do not forget that after this procedure, all saved data will be completely destroyed in all sections.
During the installation process, when you see a selection of disks on the screen, on one of which you plan to install the OS, click the key combination Shift + F10, after which the console will be displayed. Next, you need to type a few service words in it:
- diskpart;
- list disk (After all connected hard drives are displayed on the screen. Remember the hard drive ID that needs to be converted);
- select disc K (K is the identifier of the hard drive to be converted);
- clean (this command will completely destroy all data that was on the hard drive);
- convert mbr (direct conversion);
- create partition primary;
- active;
- format fs=ntfs quick;
- assignment;
- exit.
After the steps have been taken, your disk will already have the MBR style. It is possible to use software for conversion, which may not delete existing data, but this method is the most correct.
The hard drive as a storage device is useless without special configuration. Without it, it is impossible to install an operating system on a hard drive and run it. It is impossible to record, store and read information in the usual way.
Hard disk layout
For the interaction of the computer and the hard disk, markup must be applied to the latter. With the help of it, the computer, its BIOS, finds on the hard drive places from which the OS starts loading. With the help of this markup on the hard drive, it is indicated what space is used for what.
For the convenience of the user, manufacturers produce hard drives with already applied markings, and the average user does not have to deal with the initial setup of the disk. But when working on a computer, situations arise when it becomes necessary for the user to know about the sections of a hard drive, their types and purpose.
To date, apply two main ways to mark up a hard drive:
- MBR is a popular markup that has been used in the past and is still in use today.
- GPT - partition style - modern markup designed to work with modern hardware.
MBR
 Disk partitioning became widely used in the 80s of the last century, as the only one used on a PC. At that time, personal computers entered life, they worked under the DOS operating system, which required booting from third-party media. A little later, Windows appeared.
To boot the system on a hard disk boot sector is created. The computer at startup refers to it, there was an initial load. The initial boot items are loaded. Then control is transferred to the main loader, usually the installed operating system.
In fact, when you turn on the computer, the master boot record is accessed. This is how the English abbreviation MBR is translated - Mster Boot Record.
With the appearance of this markup and mass adoption, its capabilities more than satisfied the requirements of the equipment. But with the introduction of new technologies, the standard has exhausted itself. Restrictions on the use of MBR, incompatible with modern equipment:
- Use of hard disks with a capacity of no more than 2 TB.
- A hard drive can contain no more than four main partitions, as a result - a limit on the number of simultaneously installed healthy operating systems (In the case of Windows 7.8 - no more than two).
- Low markup reliability. If the boot sector is damaged, the OS cannot be started.
Despite its venerable age and limitations, MBR will remain the most popular style of boot recording. The main advantage for users is the ability to simply and quickly install any combination of operating systems.
GPT
 The GPT markup style is relatively recent. A partition on the media uses a unique identifier, the partition name. The character length of the name allows you to create so many names that among all the sections of existing hard drives there will not be two with the same name.
When using GPT partitioning, the first system, boot, partition is created on the hard drive, which stores the information necessary to boot the computer. This section will replace the BIOS of the computer. There can be 127 other sections. Each of them can be the main one and a separate operating system can be installed on each.
Partitioning data is stored in several places on the HDD, which speeds up the access time to the hard drive and the security of information. If data is damaged, it can be restored from another copy.
GPT partition sizes are limited by the file system and operating system capabilities. The conditional disadvantages of such disks include the fact that, despite the possibility of installing an unlimited number of operating systems, you can actually install only free or licensed ones.
Manufacturers of Windows OS bind the product license not to the user's equipment, but to the unique name of the hard drive partition where the system is installed. When changing a partition or replacing a hard disk, the license must be reset.
GPT compatibility
New GPT markup style imposes compatibility restrictions:

Also, compatibility should include the protective mechanism of GPT media: the protective MBR. When trying to partition a modern hard drive MBR partitioning software, the program will see one large MBR partition and will not be able to mark up data on it. This will prevent you from losing information on the GPT media.
How to find out MBR or GPT
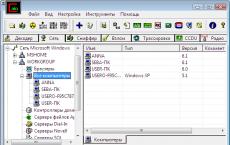
To find out the layout of an MBR or GPT disk, it is enough to use standard Windows tools. Click the "Start" button, right-click on "Computer" in the menu. Select "Manage" from the menu that appears. The Computer Management will open. You can also go here from the "Control Panel", "Administrative Tools".
Select "Disk Management" in the left column. A list of disks will appear in the center column at the top. Below is a visual representation of the devices. In the lower window on the media of interest, press the right mouse button, in the menu that appears, select "Properties".
The properties window of the hard drive will open.. The Volumes tab will list the partition style as Master Boot Record (MBR) or GUID Table, meaning a GPT disk.
You can also find out the markup using the DiskPart system program. To start, press Win + R on the keyboard, enter Diskpart, enter, agree with the security question. In the program interface, enter "List disk", press enter. In the list of disks owned by the system, disks with GPT structure will be marked with an asterisk in the GPT column.
Create and convert discs
 When converting disks, the data contained on the hard drive will be irretrievably lost. Create a disk backup.
Creating a GPT disk comes down to converting the MBR disk to GPT. To do this, you need to go to "Disk Management"(See "How to find out the disk layout"). On the disk selected for conversion, you need to delete all volumes: in the upper part of the window, right-click on all volumes in sequence and select "Delete Volume".
After deleting the volumes, you need to right-click on the basic GPT or MBR disk from below, select "Convert to GPT" or "Convert to MBR". Then follow the instructions and give the necessary explanations.
UEFI and GPT disks
With the advent of the new GPT markup style on the market, the old BIOS became irrelevant. The UEFI bootloader is used to start the computer with all its benefits:

The style of hard disk layout depends on the equipment and tasks that the user puts in front of the computer. Despite the moral old age MBR markup, it is rightfully considered the most convenient and understandable for the mass user. The absolute implementation of devices requiring GPT markup has not yet happened and will not happen soon. Also, the difference for the average user is almost imperceptible.
Users who install the latest three versions of Windows operating systems - 7, 8 or 10 (any assembly) on their PC can see a message on the screen with the text “the selected disk has the GPT partition style”.
The problem lies in the incompatibility of outdated laptop or computer software with more modern drive specifications.
The choice of a specific solution to the problem primarily depends on the bit depth of the installed Windows system and the firmware interface (BIOS or UEFI).
What is GPT and MBR?
Before you continue to install the operating system on your PC and convert partition styles, it is worth finding out what the cause of the problem is.
So, most of the relatively old motherboards were equipped with BIOS software, the tasks of which were to perform primary diagnostics and boot the operating system.
By the way, on our website you can read.
The software was designed to work only with boot records of the MBR type.
A newer version of the interface, UEFI, allows you to work with both old styles and new ones, GPT.

Rice. 1. Error when installing Windows on a disk with GPT partition style.
The benefits of the updated software are improved boot speed and data security - due to more reliable boot and support for hardware-based drive encryption.
In addition, UEFI works with the GPT style, which supports writing and reading large files. This is especially important for hard drives larger than 1 TB.
You should know: UEFI is compatible with both BIOS and MBR. And, therefore, when working with the new interface, the style of the disk does not matter. At the same time, the BIOS does not work with either UEFI or GPT.

Rice. 2. Determination of disk styles using special utilities.
Solutions to the problem
As a rule, most more or less new motherboards are already equipped with a modern interface.
And problems with installing the operating system due to the GPT style can appear only in two cases - if the computer is relatively old or if the UEFI settings do not support the new style.
The first version of the problem is solved in only one way - by changing the settings of the hard disk.
As a result, it will be more difficult to work with large files, but it will be possible to install the system.
If the problem is disabled GPT support, you just need to enable it and continue installing the platform.
Installing the system on disks with GPT
It is advisable to solve problems with installing the system on a HDD with GPT partitions, observing the following conditions:
- Using a 64-bit system;
- By setting the boot mode to UEFI.
However, most often the cause of the error is the failure to fulfill the second condition, since it hardly makes sense to install a 32-bit system now (except for computers with 32-bit processors).
To correct the situation, you will either need to change the BIOS settings, or prepare it in such a way that it supports working with UEFI automatically.
BIOS or UEFI setup
The first steps that should be taken when installing Windows of one of the last three generations on a PC is (or rather, UEFI).
This usually requires pressing a certain key during the boot process of the operating system.
In Windows 7, most often you need to press Esc , F1 or F2 , depending on the motherboard manufacturer.
For Windows 8, this will require changing the system boot settings (through the additional options of the Diagnostics menu, called by the keys Win + C).

Rice. 3. Entering the menu for changing the boot of the Windows 8 system.
For Windows 10, to enter the UEFI settings, you will have to run:
- Click on the notification icon and select the settings item;
- Go to the update and security window;
- In turn, select recovery partitions, special boot methods and immediate reboot;
- After the system has been rebooted, select advanced options and UEFI settings.
Now that the BIOS has turned on, you should configure its menu to automatically install the new system on disks with GPT.
To do this, the user must install the UEFI interface boot instead of the standard CSM.

Rice. 4. Installing the boot of the new UEFI interface.
The second step is to select the appropriate disk mode - instead of IDE, designed for the old type of HDD, you should choose.
Configuration can be done in the Peripherals or SATA Configuration menu.

Rice. 5. Setting the mode of operation with SATA disks.
Sometimes, for Windows 7, you need to additionally disable such an option in UEFI as .
Need to know: In different versions of UEFI, all these items may be located in different places. However, the setting names are retained and are relatively easy to find.
You will be interested in:
Possible installation problems
After making all the changes, just save them and restart your computer (or laptop). There should be no error messages or other similar problems.
If the problems still remain, you should fix them by creating a special boot disk.
One of the easiest ways to do this is to use the command line or special programs like Rufus.

Rice. 6. Create a boot disk that supports GPT by default.
When using such a drive, the probability of an error-free installation of the system is almost 100 percent.
However, to be safe, one more thing to do is to delete the bootmgr file in the main directory of the USB flash drive, which can lead to another attempt to boot without GPT support.
Now the system will definitely install without errors.
Convert disk from GPT to MBR
In the absence of the ability to configure UEFI, and especially in the complete absence of this interface, the user has no other option but to change the partition styles.
To do this, you can try to use the already built-in tools of the installed operating system or special utilities.
Important: If necessary, the ways to change styles back from MBR to GPT are just as simple. What's more, the data written to the disc is not lost, unlike conversion to an older format.
Convert via command line
An option to change the style of disks, suitable for computers with an outdated boot interface and, moreover, an old-style HDD (IDE).
A necessary condition for performing such actions is that the hard drive partitions must be empty, since all data is deleted during the conversion process.
If the information on the disk is not needed by the user, it can not be deleted.
Changing the style to MBR by the installer of the operating system will require the following steps:
- When choosing a partition type during system installation, press the Shift and F10 keys;
- In the command line that opens on the screen, enter two commands - first discpart, then list disk;
- After the list of hard disk partitions appears, write select disk A, where A is the number of the part that should be converted to GPT.
The next user action can continue with the clean command. In this case, all partitions of one of the disks will be deleted.
The second option is manual deletion, which requires you to enter three commands in turn (detail disk, select volume, delete volume).
The last step is to change the style. To do this, another command is entered in the line - convert mbr.
After the manual conversion to MBR has been performed, it is required:
- Enter one more final command Exit ;
- Close command line;
- Partition the disk into new partitions (it is advisable to leave a smaller part of the HDD for the system and applications, and a large part for storing important information);
- Continue installing the operating system.
As a rule, no errors occur in this case.
The only reasons for the problems to continue are problems with the hard drive or a corrupted software distribution.
In the first case, to fix the problem, you will have to contact the service, in the second, use another installation disk.
Selected drive has GPT partition style when installing Windows
Attention: this is not the only way to solve the problem: you can also simply enable EFI boot for the installation drive without converting the HDD.
Convert to MBR in Disk Management
The second option for manually switching from GPT to MBR is suitable for computers that already have a running Windows 7 or 8 installed, and the disk is not a system disk.
To resolve the issue, the user is required to:
1. Go to the disk management menu (one of the easiest options is through the run window, in which you should enter the diskmgmt.msc command);

Rice. 7. Disk management menu.
2. Find a physical (that is, not a partition, of which there can be many on the HDD) hard disk to be converted;
3. Delete all partitions from the HDD by selecting the delete item in the menu;
4. Right-click on the disk name and select convert to MBR.
5. Restart your computer and continue installation.
Convert GPT hard drive to MBR basic
Convert GPT hard disk to MBR (basic) using Paragon Hard Disk Manager.
Style conversion tool
In addition to standard methods involving the use of built-in Windows tools, there is also the opportunity to simplify your task using special utilities.
Rice. 8 Working with Aomei Partition Assistant
Need to know: When using applications that allow you to change the hard disk style settings, you can delete the first boot partition of the HDD. In this case, converting GPT to MBR and vice versa will be much easier.
Let's consider many ways about the error "Windows cannot be installed on this disk. The selected disk has the GPT partition style." There used to be an old MBR disk partition system and it could no longer operate with the new amount of TR (terabyte) data. They came up with the GPT system for disks and introduced it with the new uefi graphical bisos. Let's proceed to the presented dilemma by our own, standard means. I want to note that some users described their actions that they simply go into bios and disable UEFI mode. It all depends on many factors, up to windows architecture, 64 or 32 bit.
Solutions: Installing Windows on this drive is not possible. Selected disk has GPT partition style
1. Change UEFI Boot Mode
Nowadays, most motherboards support both traditional boot and UEFI Boot. Users can choose the most appropriate one in the bios settings. Look closely! Bios is different for everyone.
- Change value UEFI, instead of CSM in the Feature or Setup section.
- In the Peripherals line, click the SATA mode: AHCI instead of IDE.
- (This item is optional, try it if it didn't work above). In the Key Management line of the Secure Boot function, which is located on the BOOT tab, change Other OS instead of Windows UEFI Mode.
If you are recording from a USB flash drive and this method does not work, then overwrite the . Unforgettable! Press f10 to save the settings.


2. Removing partitions when installing windows
If you do not mind the data and want to do everything quickly, then delete all partitions when installing windows, and then format the entire hard drive. Then re-create the partitions you need. This will set up a new table on the hard disk.- Delete all disk partitions.
- Recreate them.
Format ( The method will erase all data).


3. Convert or convert GPT disk to MBR
The method will erase all data.
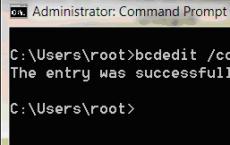
- When an error appears, click OK to close the error message and press the key combination Shift + F10, Shift + Fn + F10 (for laptops) to bring up cmd (command prompt). If nothing works, then go back one step to the windows installation interface and press the Shift + F10 button to start cmd again.
- Enter the following commands in order: diskpart -> list disk -> select disk 1 -> clean -> convert MBR. String translation: diskpart -> disk list -> select disk 1 (1 denotes number of GPT disk) -> clear -> convert MBR. The picture shows which commands were entered. You can type codes in a line based on the picture. When the diskpart program converts to MBR format, you can exit this program and continue installing Windows.

4. Apply the standard disk management utility
If another OS is available on your laptop or it is possible to create a bootable Life DVD, flash drive. You can use the standard program in windows "disk management". You can also connect your hard drive HDD to another computer.- To run the program, click "start", right-click on my "computer" or the icon on the desktop, select "Manage" and "Disk Management" in the context menu
- Delete all partitions or volumes on the disk one by one via right click, "delete volume". (Delete volume)

- When the drive becomes unallocated, click on the drive and select " convert to MBR disk" (Convert to MBR Disk). After these steps, the original GPT disk will be converted to MBR disk, and then you can proceed to install Windows on this disk.