How to run a Windows program in an OS X environment on a Mac. How to run OS X on PC. The Easiest Way to Install Windows Applications on Mac OS X Using WINE


The settings in the next window are quite important. Click the Customize button at the bottom left.
If you have an AMD processor:
- Select the AMD option under System.
If you have an Intel processor:
- All Updates selected at the top.
- In the Bootloaders combo box, select newest Chamelion.
- In the Kernels combobox, select Legacy Kernel.
Then click Done and continue with the installation using the Install button. To speed up the installation, select Skip during the disk check step.
After the message "Installation finished" appears and the reboot timer appears, press the right Ctrl key. Then select Devices from the top toolbar of Virtual Box, click CD/DVD Devices and select Unmount CD/DVD Device. Then go to Machine and click on Reset. After that, you will see the chameleon bootloader and OS X loading.
Once the download is complete, you will see the OS X settings screen! You are one step away from success. However, I found a small pitfall, which is that virtualization only works on one core. Maybe it's because of the distribution, but maybe not. Other issues that have not yet been resolved are sound not working and the inability to change the display resolution. However, in all other respects it is complete. virtual computer on Mac OS X!

Addition
There are some decisions regarding audio and resolution.
To change the resolution, open Finder and select the OS X drive on the left. Open the Extras directory. Right click on com.Apple.Boot.plist and open it in TextEdit. Insert the following at the very beginning:
or any other suitable resolution. Select "Save as" and save to your desktop by unchecking the Unicode box and choosing the name com.apple.boot.plist . After that, drag this icon from the desktop to the extras directory, overwriting the original file, entering the password if prompted.
Do not install system updates. If you need updates, you need another ISO image that already has the updates installed. If you install updates directly from Apple, they will conflict with custom patches and the Chameleon bootloader. This is just a warning.
And for those of you who are having trouble booting, try a different version of Chameleon or a different OS kernel. Sometimes it helps. If you get USB related errors, try disabling USB in VirtualBox settings and see the result.
Free mac emulator in windows
Sometimes you want to try some new operating system to get a practical impression. I have done this many times, for example. LifeHacker recently wrote about running a Mac OS X emulator on Windows. Why not look at the Mac first, so that later you can scold or praise it with arguments? In turn, for a better understanding, I translate the article from English.
We have already seen how to run Snow Leopard in VMWare. But virtual VMWare machine- paid, you can use the free VirtualBox instead. In addition to the virtual machine itself, we also need an ISO image of OSX86. The Hazard group has posted a well configured Snow Leopard installer, just google it. Of course, if you think that downloading a pirated image will have a bad effect on your karma, then nothing prevents you from buying it.
Once you have both the virtual machine and the image, install Virtual Box, launch this emulator and select New at the top left of the toolbar.
In the dialog that appears, select the settings as in the following picture and click the Next button.
In the next window, select the size random access memory. Most likely, 1024MB will be more than enough.
After clicking Next, create the virtual disk. A 20GB dynamic size disk will suffice. A dynamic type virtual disk does not take up extra space on your hard drive, but is slightly inferior in performance to a static one. virtual disk. For us it is not essential. Click Next.
A window will appear with summary information on the virtual machine being created. Click Finish.
Now select the virtual machine settings from the Settings option in the toolbar.
In the window that appears, remove the option Enable EFI.
In the same dialog box, select Storage . Click on the word Empty next to the virtual DVD drive.
Then click on the green plus icon at the bottom of this window. In the dialog that opens, select the OSX86 ISO image you downloaded earlier and click OK.
Now in the main VirtualBox window, click the Start button (located on the left).
In the emerging command line type -v and hit enter. This is necessary for detailed diagnostics if something goes wrong. Next, the download will continue and you should see a screen with a choice of language. Select a language and click Next . If, for some reason, the mouse does not respond to movement, use the keyboard shortcut Right-Ctrl-I . Click on Continue and Agree . Then launch Disk Utility by going to Utilities in the menu.
On this screen, select 20GB VBOX HARDDISK. Click the Erase tab, type OSX in the Name field, and click the Erase button. The disk preparation process will not take long. When finished, select Disk Utility from the menu and click on Quit. This will take you back to the installer, where select the drive you just created and click Continue.
Mac is beautiful in every way. Usually they fall in love with him at first sight. However, it is worth recognizing that programs on Windows have undeniable advantages: prevalence and universal recognition. It is for this reason that Mac users periodically (less and less often, fortunately) are forced to contrive and come up with ways to run programs that only go to Windows.
Some services (bank clients and other sites that work with EDS) support only (!sic) Internet Explorer, they may send you a file in some prehistoric format that can only be opened by a Windows program that does not have a Mac version. Be that as it may, such situations arise. And further in the article we will consider all the ways to resolve such situations and summarize in a way that suits almost everyone and always.
1. Virtual machines
Virtual machines allow you to run an entire operating system inside another operating system. On MacOS, three large virtual machines can be distinguished:, and. The latter has already been discussed in a recent article about.
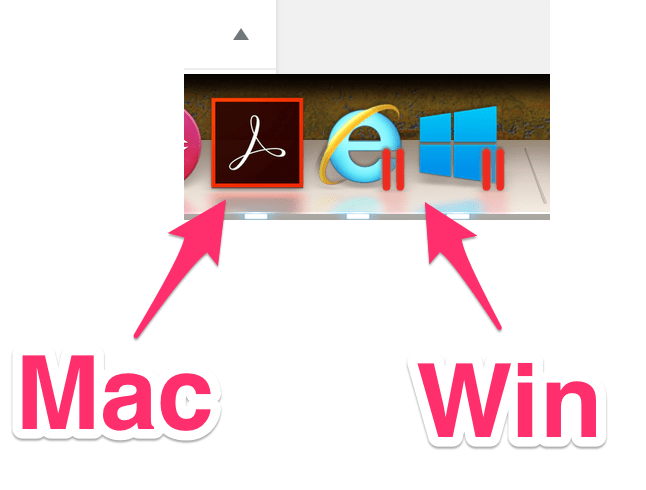
We can say for sure that if you are ready to shell out, then Parallels is the best virtual machine of these three. Especially for beginners. You don't need to configure anything during installation (and you don't even need to download Windows) - the program will do everything itself. Parallels supports the so-called Coherence mode, which runs Windows in a Mac window. Moreover, ordinary Win-applications can be pinned to the dock. And run win-files directly from Finder. In this case, files and applications are highlighted with the Parallels logo.
I must say that I personally use Parallels. I won’t talk about VMware for the reason that while choosing a virtual machine for myself, I realized that “Parallels” in this moment head and shoulders ahead of VMware and there is no particular choice among virtual machines.

The only downside is, of course, the price. The program has only paid versions and the cheapest (home) will cost you (at the time of this writing) 3.990 ₽
At the same time, the same VirtualBox is free. But to install it will have to strain a little. In addition, the result in VB will not look as beautiful as in Parallels, because the latter was made specifically for the Mac, and VB is a cross-platform program. If you are ready to get confused and save money, then about installing Windows 8 in VirtualBox.
If in doubt (and there is not much time), then put a 14-day trial version of "Parallels" and during this time decide whether it is worth the money. If you definitely don’t have money for paid programs, then VirtualBox is the best choice. For VirtualBox, at the same time, look at articles about and, in fact,. Recall that Win10 can now be installed simply and without activation (with a little uncritical limitation of functionality).
| Advantages | Flaws |
|
|
2. Boot Camp
While virtual machines allow you to run Win inside a running macOS, Boot Camp allows you to install Windows directly on the Mac itself. Also known as “dual boot”, Boot Camp allows you to have a Mac and Windows on the same hard drive.
MacOS requires Boot Camp Assistant and this wizard will guide you through the entire installation process. What is the installation itself: an additional (bootable) partition will be created on the hard disk, where Windows will be located and you can then boot the computer from it.
How to install Windows 10 through Boot Camp Assistant
You will need:
- Flash drive or external HDD 8 GB or more (information on them will disappear, so do not use a USB flash drive with your dissertation)
- The Mac must be plugged into an outlet. It will not be very cool if it turns off in the middle of the process
- Need a license for Windows 10
- Connected internet
1. Download Windows ISO
Microsoft on its official website offers Windows ISO files for download for free.
Be sure to read the list of minimum hardware requirements. If your poppy does not match them, then you should not even try. After reviewing the minimum requirements, select the version ( Windows 10) press the button “ Confirm“.
Next, select the language of the product (for example, Russian), press the button “ Confirm“. After that, your system will be checked for compatibility and if successful, you will see download links on the screen.

Choose the version with your processor bit depth (in my case x64) and download the ISO file with Windows.
2. Insert a flash drive
Disconnect all USB devices from the computer during installation. Insert the prepared flash drive or external hard drive.
3. Launch Boot Camp Assistant
MacOS X has a built-in BCA (Boot Camp Assistant) and it will do everything by itself, so you don't need any third-party utilities. In order to launch BCA, open Spotlight (there is a magnifying glass icon in the upper right corner of the screen, click on it), and there enter Boot Camp Assistant. Choose a program Boot Camp Assistant.

4. Select installation type
Select the first item " Create a Windows 7 installation disc or newer“. Second checkbox ( Download the latest Windows support software from Apple) in theory will be checked by default and it is impossible to turn it off. But the third item can be enabled or disabled by default. Turn off third point ( Install Windows 7 or later). Next click " Proceed“.

5. Burn Windows to a flash drive
Select the Windows ISO file you downloaded in the first step.
Make sure that the prepared USB flash drive is selected as the disk for installation.
Please note that the flash drive will be formatted in the process and all data on it will be lost.
Press " Proceed“. Another window will appear asking if you are sure you want to continue. the flash drive will be formatted and the data will disappear. If you are sure - click again " Proceed“.
If you are doing the operation on a MacBook, do not close the laptop lid. This will put the Mac to sleep and interrupt the write process.
After everything is over, you will see the message “Windows has been saved”. Click " Exit“, unmount and disconnect the flash drive.
Congratulations, you have a windows flash drive for mac.
Run the installer from a flash drive
In order to boot from a USB drive, you need to hold down the Mac boot ALT(a boot menu will appear, where you need to select a USB flash drive). Or when booting a Mac, hold down C, then the computer will immediately boot from the USB flash drive.
After you boot from the flash drive, .
So, sir, it was a small lyrical digression on the topic of installing Windows 10 as a second system on a computer. Now let's get back to where we started: is it worth it and who will suit it.
The main downside to this whole dual boot thing is that you won't be able to run Win and Mac programs side by side. Every time you switch between systems, you need to reboot and select an OS. This has its upsides, of course, and they are more system performance, because Windows can use all the resources of your Mac.
3.Wine
Both solutions above (virtual machines and boot camp) involve installing a full-fledged Windows with all the nuances that follow. Wine is something else. This is a “shim” that allows you to run Win-programs on MacOS and Linux. In this regard, Wine is a much easier solution than Windows installation, especially if you need to use 1-2 popular programs. But as is often the case, compromise options have a whole set of limitations and pitfalls.
That's the problem: Wine does not work with all programs. Some start up and work great, others may give an error while running, and still others won't start at all. To get started, you can check for program compatibility and search there for the applications that you need.
And another problem lies in the fact that this is not quite a “boxed solution” and finishing can cause a form of embarrassment for new users.
The second problem can be slightly simplified. For this, the WineBottler program was created, and we'll talk about it.
choose stable version, download the DMG file.
After opening the DMG file, drag and drop Wine and WineBottler into Applications (just like you do when installing any other software not from App Store).

Once installed, launch WineBottler and you'll see a list of programs that you can install on the fly, such as Internet Explorer.
To run other Windows programs through Wine, download executable files these programs (.EXE) and run them as follows: right click and Open -> Wine. Yes, once again I repeat that not all programs will work through Wine.
Below is a video about WineBottler in broken English, in principle, everything is clear in it and without translation 😉
Wine is good when you need to work with 1-2 programs that are guaranteed to be compatible. If the list of programs is wide and changes regularly, then you should choose another way to work with them.
crossover
CrossOver is a paid solution that is also based on Wine.
The application offers a high-quality interface that allows you to simply enter the name of the required Windows program and it will be found and launched. Since this is commercial software, you can count on the help of a support if something goes wrong with you or you need support for some program that is not on the list.
But compared to the options above, CrossOver is a complete compromise and won't work for most users. Again, if you need to run various programs, it is much easier to do this using a virtual machine. If performance is important to you (for example, in games), then it is better to use Boot Camp. In general, with a price tag of $ 40, this option can be recommended for highly specialized applications.
Remote access
If none of the options above suits you, then why not try to deal with the problem in a different way? If you have another computer that has Windows installed, then you can use remote access to work on it from your Mac.
TeamViewer is a free and powerful remote access tool. About remote access, by the way, was.
All you have to do is choose a communication method, install it on both computers (Win and Mac), log in to your account on both machines, check the “easy login” box on Win. And after that, you can connect to a Windows computer at any time.

Depending on , you may experience some delays and slowdowns in your work. Oh, and also, the lack of cross-support for hotkeys is slightly annoying. You try to switch the language on the Mac in the usual way, but instead of changing the language, all sorts of windows pop up. But on the other hand, if you need relatively fast (and free) access to Windows, then this option may suit you!
| Advantages | Flaws |
|
Above we have explored all possible options ( if not all, then write in the comments, we will supplement the article). The option with the least number of evils for most people is installing Windows in a virtual machine (option #1). The exception is users who need Windows to play games. Using a virtual machine allows you to open Windows programs at the same time as opening Mac applications, all without restarting your computer. And it works much more reliably than Wine. Use Parallels or VirtualBox - it's up to you. If you don't mind paying for a boxed solution, you're not a computer specialist, and you want the best results, choose Parallels. If you are “on a short footing” with a PC, there is time and a desire to get confused + you want to save money - choose VirtualBox. Results:In fact, if virtual machines are the best choice for the average user, then in general, this does not mean that this is the best choice for you and your tasks. So let's go over all the options again: |
4 best emulator Android on Mac
If you're an Apple fan but want to play some games for or run a Google OS-only app, then you'll need an emulator. Let's take a look at the top four emulators available to users.
1. Nox
Nox App Player- a great choice if you are looking for an emulator for games. It even supports game controllers. You can also use Nox to test your apps, but it's still designed specifically for gamers.
2. Bluestacks
Bluestacks is one of the most popular emulators for Windows and the version for Windows won't let you down in the slightest. This is another emulator created primarily for gamers. Like Nox, you can install apps and games through the store Google Play. There is built-in support for Xbox-compatible controllers, but only in select gamepad-enabled games.
Performance depends on your system, but latest version Bluestacks is much lighter than previous versions.
3. Genymotion
If you need emulation for development, then Genymotion is worth considering. It is designed for software developers and allows you to test your applications on various virtual devices.
One of the key features for developers is the ability to use Genymotion Cloud, their cloud service virtual emulation. This means that anyone can interact with your virtual device through a web browser, making it ideal for project sharing without the recipient having to install Genymotion themselves.
These features are not free - the desktop version costs $136 per year for a single user. For Genymotion Cloud SaaS starts from $200 per month. Exists trial version, but to download it you need to register and verify your email.
4. Android Studio
Android Studio is Google's own tool for app developers. This is not just an emulator - it has all the necessary tools for developing and creating your own applications. Emulation allows you to test your creations on virtual devices.
With so many features, this is not a choice for those who just want to run a few android applications or games on MacOS. But if you are an app developer, then this is one of the most important tools you will need. You can also simulate incoming calls and SMS messages, set device location, and even simulate motion sensors.
The installation is quite lengthy and the user interface is not the most beginner-friendly. This is mainly due to the fact that Android Studio offers a lot of features. The emulator itself allows you to choose from a huge number of device profiles to test your application. Since this is the official Google emulator, it supports emulation up to Android Pie 9.
Choosing the right emulator depends on your own needs. If you just want to play some Android games on Mac devices, then paying for Genymotion is not for you.
Thanks for reading! Subscribe to my channel at Telegram and Yandex.Zen . Only there the latest blog updates and world news information technologies. Also, follow me on social networks.
In most cases, users of OS X are quite satisfied with the existing set of software for this system. What to do when the necessary application is developed exclusively for the more popular Windows system? There are several ways to run a Windows program on a Mac computer in an OS X environment.
There are three ways in total:
bootcamp
Boot Camp is a program included with Mac OS X 10.6 Snow Leopard that allows you to install and use a compatible version of the OS Microsoft Windows on a Mac computer with an Intel processor. (Apple)
Apple introduced BootCamp in 2006, after the Mac switched to Intel processors. For the sake of historical fairness, we note that it was possible to run Windows applications on the Macintosh before: for this, an expensive expansion card was installed on the Macintosh. For obvious reasons, this solution was not popular.
Before creating an additional partition on the hard Mac disk, create backup computer contents using Time Machine, and then launch BootCamp Assistant (located in Programs - Utilities) and follow the instructions.

The solution is not ideal, but the main thing is that Mac turns into Windows computer. And this means that the system from Microsoft will work at maximum speed.
Disadvantages of BootCamp:
- Windows requires a full restart of the Mac to start. To select an operating system (OS X or Windows) during boot, press and hold the Option (Alt) key.
- Sections ( logical drives) created on Windows are not visible on OS X and vice versa. Why? Windows does not understand the HFS+ file system that OS X works with, and the latter does not work with NTFS by default. With the help of additional utilities like Tuxera NTFS, you can add NTFS compatibility (read and write) to OS X.
- BootCamp only installs certain Windows versions. So, only Windows 8 with all its inconveniences.
BootCamp will come in when there is no need to boot two operating systems at the same time and you need maximum performance. For example, it can be useful for gamers: after working in OS X, they restarted the computer and launched their favorite game in the Windows environment.
Windows emulator
The method is only good for running one or two Windows programs in the OS X environment. This provides sufficiently high performance and there is no need to install an additional system.
Using Wineskin and CrossOver, you can try to run something incompatible with OS X software. It is to try, because such a number does not always work: even if successful, stability problems may arise.

Novice users may encounter problems, as certain knowledge is required to work with the emulator. Nothing complicated, information is easy to find on the Web, but given that there are other ways, this method cannot be called elegant.
Virtual machine
Virtual machine(VM, from English. virtual machine) is a software and/or hardware system that emulates Hardware some platform (in our case, OS X) and an executing program for the target platform (Windows). (Wikipedia)
The best solution when you need two systems at the same time, or you need to switch between them frequently. For example, for developers. When you start Windows in a virtual machine, you do not need to restart your Mac, and you can simply drag and drop files from different partitions with the mouse from one window to another. In addition to Windows, you can install any modern operating system in a virtual machine, with the exception of outright exotics.
To deploy an operating system (one or more) that are not supported by Mac, you need to install a virtual machine (program) on OS X. There are enough similar programs: Parallels Desktop, Vmware Fusion and Virtual Box. Each has its own advantages and disadvantages, but in any case there is plenty to choose from.

Separately, I would like to note Virtual Box from Oracle. This program has one important advantage - it is free, while competitors cost a lot of money: Parallels Desktop - from $79; Vmware Fusion - from $150. A free virtual machine has performance problems and even frequent lags are inevitable. Virtual Box is a great solution if you only need Windows for a couple of undemanding utilities.
After creating a virtual machine (installing the program and setting up the machine), you can proceed to install the system. It is important that this can be done directly from a bootable USB flash drive that is connected in a virtual machine through a virtual USB port. Also, Windows can be installed from an ISO image.
Disadvantages of virtual machines:
- Limited performance - virtual machines squeeze out a fraction of the hardware power of the Mac.
- When an external device is connected to the Mac, it is not available in the virtual machine (it is connected in a separate menu).
What to choose?
The answer to this question depends on the needs. If you need a single application, using BootCamp is not practical, as it requires a computer restart. In this case, it's easier to run Windows in an emulator. The virtual machine allows you to install various operating systems and easily switch between them - ideal for developers creating cross-platform applications.
Well, if you need high performance (gamers), then BootCamp will be ideal.
P.S.: Some virtual machines are able to run Windows installed with BootCamp.
When moving from Windows to Mac OS, perhaps the most common first thought is - how will I live without my favorite Windows programs?
There are a sufficient number of ways to solve this issue and this cannot but rejoice! Each method is good in its own way and there are both paid methods and free ones. To begin with, it is worth deciding whether you really want to use Win programs under Mac OS? Perhaps now you think that way, but over time, I assure you, windows on the background of Mac OS will seem miserable to you and a search for alternatives will begin in order to move away from Windows systems and forget it like a terrible buggy dream.
Well, in the meantime, you don’t have such thoughts yet and the feeling of some uncertainty in the selection of alternatives remains, let's look at one of the good options for running programs for Windows under Mac OS.
Let's take a look at the Windows emulation options and figure out together which of the options the utility solves in the review.
- Boot Camp- installs windows 2 operating system and does not allow the use of two operating systems at the same time. This method is good because Windows uses all the resources of the computer to the maximum, in particular, it makes it possible to play.
- Installing Windows/Linux virtual machines etc... This method allows you to run Windows in a separate window or organize it as a separate desktop. This method is good because we can use several OS at the same time and even switch to Unity mode, which allows you to open Windows programs like regular Mac OS programs, i.e. you will have on the screen open programs, no windows desktop. This method is very good and suitable for owners of powerful computers. The disadvantages include the impossibility of installing "heavy" 3D games. the emulator does not fully support your video card. Also, the disadvantages of this method include the excessively occupied space by the emulated system and the “guzzling” of a certain percentage of your computer resources (RAM, processor).
- Installing Windows emulators. This option is the best if you need to constantly run some kind of non-resource-intensive program, which has no alternatives for Mac OS, although today emulators also allow you to run "heavy" 3D games (but I have not tested this). Emulators are good because they create a kind of “bottle” for each program, in which the program itself is located, as well as vital files to run it. This method allows you to significantly save space and resources on your computer.
Today we will get acquainted with the third option "Installing emulators in Windows"(later everyone else).
There are options for paid emulators and free ones. Free ones usually require a lot of gestures and discussions on how to use them. In paid ones, it all comes down to simple mouse clicks.
One such emulator is CrossOver ($60) and is still considered the best tool today!
The first huge plus of the program is the support of the Russian language. You will not have any difficulties using the program, and now I will show and tell you everything.
The program does not have outstanding interfaces (outwardly it reminds me of the good old one), because. you know what its main task is. After installing and running the program in the system menu, we see:

Let's try to take any sample program, for example the VKMusic program under Windows. Downloading setup file VKMusic_4.45.exe

Next, in the system menu, select "Configure" and "Install software"

This window opens. In the list of supported programs, there are many things. You can bother and pay attention to it. Even if the list does not contain the program that you want to install - you still install it and it will work, but for this it is important to scroll down the list and in the tab " Unsupported Applications" choose " Other Application"

Next, go to the "Choose an installer" section.

I think comments here will be redundant. Just specify the path to the installation file of the program, in our case VKMusic_4.45.exe in the Finder.

pay attention to the label exe file, it is in the form of the CrossOver logo. In fact, to install the program, you could immediately click on it and it produced automatic installation, however, my task is to introduce you to the program so that you can navigate it.

so, you have chosen the installation file. Now you can safely press the "Install" button in the very bottom right corner and CrossOver will create separate bottle and will install it. However! before installation, you have the opportunity to select the axis under which the program runs (xp, win2000, etc.), as well as rename the bottle itself. To do this, go to the section "Select a bottle into which to install"

Here you choose under what OS your program works and enter the name of the bootle.
If you have installed games before and want to store them in one bottle, then select a ready-made bootle with the installed game and program.
What is the best way to create new bootles or store everything in one?
when creating a bootl, as I wrote above, vital system files from Windows are added to it. Of course, a program that takes 12 MB will weigh 300 megabytes, due to the added system files. If you create new bootls, they will waste your HDD disk space, but again, all these are trifles. I prefer not to bother and every time I create new ones, so that later I can delete the excess with peace of mind.
And here is the installation process:

1. A bottle is created

2. The installation of the program starts in the same way as on Windows. I did not recognize the encoding of Russian words, it's okay.

just install it like a normal Windows program. the path in this case is inside the bottle itself, there is no point in changing it.

Ready.
Now we try to run the installed Windows program: 
That's all love.
P.S
1. Label installed windows The program is also added to the "Mission Control" Mac OS and looks like a normal Mac OS application: 
2. if you need to manually change the internal files of the program in the bootle, for example, transfer game saves to the program folder or something else, this is done simply: 

3. Where does CrossOver store bootlies? 

4. Is it possible to install programs that do not have an installation?
Possible!


