Windows does not see the hard drive. What to do if the computer does not see the internal hard drive
Hello dear friends!!! In this article, I want to talk about why after - does not see a broken hard drive. I didn’t just decide to write this article, there were just a lot of questions about this, of course there is a lot of material on this topic on the Internet, but still people ask questions and I think that it will not be superfluous on my site.
Why is the hard drive broken during installation operating system, the answer is simple, for the convenience of storing files, so that your data and files are not crowded on the same partition with windows, so that you can install programs and games on a separate hard disk partition without touching the partition with the operating system. In general terms, I think everyone understands what all this is for. So let's get started.
Let's say during the installation of windows 7 you partitioned your hard drive into two partitions. Your first section C"on which you install the system, and the second partition" D» on which you will install games, programs, upload photos and files in the future. After installing the system, you go to "My Computer" and see only the section " C", and the section" D The system does not see the hard drive. What needs to be done so that the system sees the second partition of the hard disk? Right-click on "My Computer" and select the "Manage" tab. A window will appear where you need to select the "Disk Management" tab.
You will see such a window where your hard disk partitions will be displayed.

In order for the section " D" was visible in "My Computer", right-click on the second partition and select the "Format" tab. Attention: After formatting, all data on the hard disk will be deleted.

After formatting is completed, you will need to set a letter for this partition, if you do not set a letter, then the system will not see a broken hard drive. See the screenshots below for how to do this.


Good afternoon.
There are many reasons why one computer cannot see another over a local network:
1. Computers are in different workgroups:
Go to "System Properties" and in the item "Workgroup" check the compliance;
2. Different operating systems.
Let's say the first PC is on XP, and the second is on windows 7. Here, a situation often arises when network discovery is disabled on the "seven" or password protection is set for access "from the network";

3. If the computer is on windows 8, manual configuration of access to devices with 40 and 56 bit encryption can help;

4. Windows Firewall may be blocking access
This is a very controversial issue, but often it is the inclusion or vice versa that the firewall is turned off to help solve this problem;
5. Also check if the second computer “responds” to the command - ping ip address (of the second PC);

6. Perhaps a firewall is installed on the router that blocks incoming connections;
7. Finally, check if the ip addresses of the computers are on the same subnet.
tvoi-setevichok.ru
windows 7 or xp does not see workgroup computers
If computers are not displayed working group on the local network, you cannot use a shared network folder, the terminal mode does not work, there are several options for solving this problem, one of which should definitely suit you. 1. Turn off and on the network equipment (switches, modem). Check if Internet access works on computers that are not visible on the network. In the lower right corner on the taskbar, open the LAN connection icon and check if there is activity in the sent and received packets. If there is no Internet access, packets are not sent or received, then the network card may be faulty, the Ethernet connector has come off, or the network cable needs to be replaced.
2. Check if all computers are assigned the same workgroup. The group name and computer names must be spelled out with Latin letters(not in Cyrillic).
3. Experiment with windows firewall. Try turning it on if it's off or off if it's on. If, after restarting windows, the computers of the workgroup are not displayed, then we try the methods below.
An example of enabling/disabling the windows firewall:
4. Enable these network services if they are disabled: Computer Browser, Network DDE Manager. (On the desktop, right-click on the “My Computer” shortcut and select “manage” from the context menu that appears. Find the desired service, set “Startup Type: Auto” and click on the “Start” button). 5. In the properties of the Internet protocol TCP / IP, assign static ip-addresses to computers on the network, write down the default gateway (ip-address of the modem), subnet mask.
Example in windows XP:
(in windows 7 select “internet protocol version 4 TCP/IPv4”)
6. Turn NetBios in via TCP/IP
An example of enabling NetBios in windows:
7. Check computers for viruses. We recommend using Dr.Web CureIt! or LiveCD from Kaspersky or the same Dr.Web. All these utilities can be downloaded for free from the developers' websites. It often happens that the firewall of some anti-virus program blocks a computer infected with a network worm on the local network. If no viruses are found, disable your anti-virus programs for a few minutes and check again to make sure that the anti-virus firewall is blocking access.
You do not have permission to add comments! Register!
Free templates for Joomla 3.5
news-it.pp.ua
Can't see computers on windows XP network
Do you have home network, which includes a computer with windows XP? Surely, they encountered a problem when he does not see other devices on the network. Perhaps, in this article we will consider how to solve the problem that has arisen.
Below are a number of reasons for the problem and how to solve them. At least one of them will definitely fit your case.
- No PC is visible in the LAN workgroup.
Make sure all computers are connected to the network.
The operation of the PC in standby mode also contributes to the fact that it cannot be detected.
Notice the network connection activity on the PC. To do this, click on the wireless connection icon or via cable in the notification area.
Check the functioning of the network equipment (router, switch), reboot the switching device.
- The second issue could be different workgroup names.
We call the "Properties" of the system through the "Control Panel" windows. Go to the "Computer Name" tab, where we click "Change", set the name of the workgroup as on the target device, save the changes made.
- Open the connection status window to check network activity.
If no packets are sent or transmitted, no computer on the network will be visible. The Ethernet connector may have come off, the cable is severely kinked, needs to be re-crimped, or is damaged.
- Set static IP and enable
We go to the "Properties" of the active connection, then open the "Properties" dialog of TCP / IP and set static IP for all devices. We also prescribe the subnet mask and DNS server.
Click "Advanced", go to the "WINS" tab and move the switch to the "Enable ..." position, as in the screenshot.
- Try deactivating the standard and, if available, third-party firewalls.
We go to the "Security Center" in the "Control Panel".
Move the checkbox to the appropriate item, click "OK" and restart windows.
See also: Configuring Windows XP Services
- Checking the functioning network services, the inactivity of which leads to the fact that network computers are not visible.
We call the context menu "My Computer" with windows XP, select "Management" and go to "Services", as shown in the screenshot below.
We find the service "Computer Browser", through the context menu we set the "Automatic" startup type and start the service.
In principle, this is all that can be advised to solve the problem of the inability to see computers through the local network.
(Visited 10 178 times, 56 visits today)
windowsprofi.ru
The computer does not see computers on the network. Computer does not see WiFi networks
Sometimes situations arise when the network seems to be configured, and the terminal is connected to a wired or wireless network, and the parameters are set correctly, but still local computer does not see computers on the network or even active ones themselves this moment networks. There can be many reasons for this, as well as ways to eliminate such problems. Consider the most common.
Why does the computer not see the network?
To begin with, when establishing a connection using a wired connection, first of all, you should check whether the cable is firmly inserted into the network card of the local terminal or into the distributing computer unit (laptop or router) in case wireless networks WiFi based.

These are problems of a physical nature, which are not worth focusing on. Let's consider cases when a computer does not see a network of any type and, accordingly, terminals connected to them, associated with some parameters and settings of such connections.
I would like to immediately draw attention to the fact that computers connected to any type of network and currently in low power mode (hibernation or sleep) will not be perceived by the local terminal either, considering them disconnected.
Problems with wireless networks
Let's start with wireless networks. If the local computer does not see the WiFi networks that are currently active, there are several reasons for this situation, of which the following are the most common:
- incorrect configuration of access to networks on a single computer;
- incorrect router parameters;
- disabled or faulty Wi-Fi module (or network adapter);
- missing or incorrect installed driver network device;
- blocking the connection by an antivirus, the built-in windows firewall or a third-party firewall.

Most of the points apply not only to cases when the computer does not see the WiFi network. This applies equally to wired connections (with the exception of router settings).
To fix the problem, you first need to turn on the Wi-Fi module (on laptops, there are combinations for this function keys with the Fn button). On routers, you need to enter advanced settings and check if the wireless connection is enabled. If this does not help, you may need to change the channel (the easiest way to do this is with the automated Insider for Home utility.
Sometimes disabling encryption (authentication section) can help. To correct the situation, set the value to Open System. Finally, the key length may be a problem (section "WPA Preshared Key"). If its length exceeds 20 characters, the router with this key will not be able to work.

As for IP addresses and other settings, the properties of the default TCP/IP protocol should be set to receive them automatically. In the "Task Manager" you can try to reinstall the drivers for the network adapter and the corresponding controllers. You can also use special programs driver updates such as Driver Booster.
The computer does not see computers on the network: configuring group names
However, even with the correct settings, the situation may not change. Let's take an example when the computer does not see the local network. Most experts attribute this problem to incorrect group names, because windows (most often XP) does not list existing local groups when creating a new connection, but by default sets its own new group (WORKGROUP).

The troubleshooting technique is to rename the group and the name of the local computer in it. To do this, in the Control Panel or in the computer properties menu, enter the terminal name section, click the Change button and specify exactly the same name for the group and local computer as on the target terminal.
Using Static IP Addresses
Another problem with the local computer not seeing the computers on the network may be that the single terminal does not automatically retrieve the IP address settings and server settings.

To change them, you need to enter the menu of the active network connection and select the settings of the properties of the TCP / IP protocol (v4 or v6). Here, for each terminal, you need to specify IP addresses, subnet mask values, gateways, preferred and alternative DNS server settings, and uncheck the box for using a proxy for local addresses.

After that, by pressing the "Advanced" button, we go to a new window of parameters and in the WINS tab at the bottom we activate the NetBIOS over TCP / IP enable line.
Setting up system services
Another way to check the connection is to use the administration (management) section, where the "Services" item is selected. The easiest way to access it is through the Run console (Win + R), where the services.msc command is entered.

Here we use the line of services and applications, where in the additional section of services on the right we find the line of the computer browser. Make sure the startup type is set to automatic. If another parameter is specified, change it to activate the component.
Troubleshooting Firewall Issues
Finally, the problem that the local computer does not see computers on any type of network can be due to a self-imposed blocking by antivirus software that considers the connection to be invalid, or a firewall. With antiviruses, this situation is very rare, but you can try to disable the firewall.
To deactivate the standard windows firewall, use the Security Center section in the Control Panel, where the firewall is disabled. If the system has installed software third-party developer, it is also recommended to deactivate it.

If you do not plan to disable the firewall, you can try creating a new rule for TCP / IP and add the corresponding connection or port to the exception list.
A few last words
That's it for troubleshooting common network connection errors and how to fix them. The problems of virus exposure and various kinds of malfunctions of individual "iron" components or the lack of general access to individual terminals were not considered here. But in terms of the correct installation of the main settings, the above methods help in almost all cases.
Installing an operating system in the current realities has become a very simple and understandable procedure. However, in some cases there are problems, such as the lack of available media in the list hard drive, on which it was planned to install Windows. In this article, we will understand why this happens and how to solve this problem.
The operating system installer may not "see" HDD in two cases. The first is a technical malfunction of the carrier itself. The second is the absence in the assembly SATA drivers. The failed disk will have to be replaced with another one, but we will talk about how to solve the problem with the driver below.
Example 1: Windows XP
On Win XP, in case of problems with the disk during installation, the system goes into a BSOD with an error 0x0000007b. This may be due to the incompatibility of iron with the old “OS”, and specifically, the inability to determine the carrier. Here, either the BIOS setup will help us, or the introduction of the desired driver directly into the OS installer.
Example 2: Windows 7, 8, 10
Seven, like subsequent versions of Windows, is not as prone to crashes as XP, but similar problems can occur when installing them. The main difference is that in this case there is no need to integrate drivers into the distribution kit - they can be "thrown" at the stage of choosing a hard drive.
First you need to get correct driver. If you looked at the article about XP, then you know that almost any driver can be downloaded from the DDriver.ru website. Before downloading, you should determine the manufacturer and model of the chipset motherboard. You can do this with the help of the program.

On this page, select the manufacturer (AMD or Intel) and download the driver for your operating system, in the case of AMD,

or the very first package listed for Intel.

- First of all, you need to unpack the received files, otherwise the installer will not detect them. To do this, you can use the programs 7-Zip or WinRar.
Drivers from the "red" are packed into one archive. Extract them to a separate folder.

Folder with unpacked package\Packages\Drivers\SBDrv

Then you need to select a folder with the bit depth of the installed system in it and copy all the files to a USB flash drive or CD.

In the case of Intel, an archive is downloaded from the site, from which it is necessary to extract another archiver with a name corresponding to the bit depth of the system. Next, you need to unpack it and copy the resulting files to removable media.

Preparation completed.
- Let's start installing Windows. At the stage of selecting a hard disk, we are looking for a link with the name (the screenshots show the Win 7 installer, everything will be the same with the “eight” and “ten”).

- We press the button "Review".
- Select a drive or flash drive from the list and click OK.
- Put a tick opposite "Hide drivers that are incompatible with computer hardware", then press "Further".

- After installing the driver, our hard drive will appear in the list of media. You can continue with the installation.

Conclusion
As you can see, there is nothing wrong with the absence of a hard drive when installing Windows, you just need to know what to do in such cases. Enough to find required driver and follow the steps in this article. If the media is still undecided, try replacing it with a known-good one, a physical failure may have occurred.
There are many ways to exchange data between PCs, but not all of them are equally convenient and effective. It is also important in which network such an exchange takes place, global or local. If the network is local, use cloud services will be less rational than combining computers into one workgroup, in which data can be transferred without any intermediaries.
Technically, organizing a local network is not particularly difficult, which cannot be said about fixing one of the most common problems when a computer does not see other computers in Windows networks 7/10. The problem can be caused by various reasons, but most often its source is incorrect network settings and disabled services. So, what often prevents computers from seeing each other on a local network?
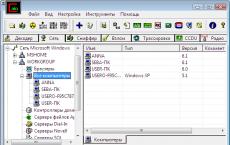
It is not difficult to view the list of PCs available on the network, just expand the "Network" on the Explorer navigation bar or run the command net view.

If the computers are connected, and the command returns "there are no items in the list", check the following settings one by one.
Network discovery
Open by team control /name Microsoft.NetworkAndSharingCenter Network and Sharing Center, go to Extra options and make sure that the network type of the network profile you are using is "Private". Next, check that the profile settings have enabled network discovery, access to files and printers, and that there is windows resolution manage homegroup connections.


Now go to the "All networks" profile and enable (if disabled) sharing for network users, and disable password protection, on the contrary.

Return to the Network and Sharing Center, click "Change adapter settings", go to the properties of your adapter and check if the checkbox " General access to files and printers…”. The checkbox under IP version 6 (TCP/IPv6) must also be checked.


On Windows 10, you can access all of these settings from the Network and Internet section of the Settings app. Note that the "Make this computer discoverable" option in your connection's properties must also be enabled.

Working group
The reason that computers do not see each other on the Windows 7/10 local network may be incorrect workgroup settings. Open the system properties, on the "Computer Name" tab, click "Identification", and when the wizard starts, select these settings in sequence:
- The computer is part of a corporate network;
- My organization uses a network without domains;
- The workgroup name is WORKGROUP.


After that, you need to restart your computer and once again make sure that the network type is set to "Private". The name WORKGROUP is the default, do not change it if possible. All computers on the network must use the same (same) workgroup name, and this is a very important point.
Network Explorer Service
In Windows 10 1703 and above, problems with the network environment can be associated with a disabled or, on the contrary, a running Network Explorer service. See if you have the SMB 1.0 CIFS protocol enabled in the Windows components section. If so, try disabling it, thereby deactivating the Network Explorer.

If Browser is disabled (in latest versions Windows 10 as it should be), try to turn it on, and then reboot and check if the computers on the network are detected correctly.
Other network services
Network discovery issues in Windows 10 1803 are more common than in other versions of the system. This is due to the limitation of the functionality of workgroups, which Microsoft considers an obsolete component. In this version, a number of services responsible for discovering other computers on the local network can be disabled. If no computers are visible in Windows 10 Network Neighborhood, you need to make sure that the following services are enabled:
- Feature Discovery Resource Publishing (Automatic type);
- SSDP detection;
- Computer Browser (SMB 1.0 above);


After enabling these services on all computers, reboot. If the other settings are correct, your PC should discover other resources on the local network.
Reset
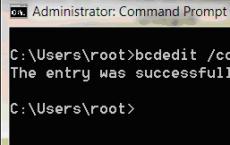
If Windows 7/10 still does not see computers on the network, it is probably worth resetting the network settings to the default values. To do this, open as administrator command line or the PowerShell console and run the following commands:
- netsh int ipv4 reset My.log;
- netsh int ipv6 reset My.log;
- netsh winsock reset.

To reset the settings, you will need to restart the computer, about which Windows will notify you. But even this measure does not guarantee correct network discovery. There are other reasons why a computer is not visible on the network, in particular, incorrect drivers (rarely), as well as blocking the connection by a third-party firewall and antivirus.
Installing Windows 7 is simple and polished, but far from perfect. Therefore, situations may arise when the installation wizard simply does not see certain devices on the computer, preventing the user from completing the initiated procedure normally. And if you have such difficulties - read the content.
Installing Windows 7 does not see the USB mouse and keyboard (we solve the problem with BIOS settings)
If the Windows 7 installation does not see a mouse or other input device, the first thing to do is to check the USB ports that these peripherals are inserted into.
Ports in blue (USB3.0) can not supported master, and therefore, at least during installation, rearrange the equipment into gray ports ( USB 2.0
).
In most cases, the problem will be resolved. Otherwise, do the following in order actions inBIOS(later in the article, these actions will be described step by step):
- Disable(Intel) xHCI mode » tab « Advanced » ;
- Try a different point value USB Legacy Support ;
- Reset BIOS.
Check the operation of the mouse and keyboard after each step, starting from the first. First you need to go into the BIOS. Learn more about how to log in. BIOS on various devices (desktop computers or different brands of laptops), you can look at this article: how to enter the BIOS. Restart your computer and at the motherboard logo enter « Setup Menu » by pressing the key F1 (F2, F12, Delete- depending on the BIOS). Now let's get started:
Step 1 - Disable (Intel) xHCI Mode
You can find this option in the tab « Advanced » on the menu BIOS.
- Go to « Advanced » , navigating with the arrows on the keyboard;
- Change the mode to « Disabled » in step « xHCI mode » ;
 Figure 1. Set the Disabled mode for xHCI Mode.
- We save settings by going to the tab « exit » and selecting " exit Saving Changes »;
- We check the mouse and keyboard by trying to install the OS again.
- Line « xHCI mode » missing;
- Item fulfillment « Action 1» gave no result.
Step 2 - Switch USB Legacy Support Mode
Unlike the one described above, the option «
USB Legacy Support»
available for editing on the vast majority of systems.
It is also located mainly in the tab «
advanced »
. We need to change the mode of this function to the opposite ( "Enabled" on the «
Disabled"
or vice versa).
 Figure 2. Changing the USB Legacy Support value.
Do not forget save changes tab «
exit
»
by selecting the option " exit
Saving
Changes
”, the computer will restart automatically.
We check our devices by running the Windows installation again. If the peripheral still does not work, you should try reset motherboard settings.
Step 3 - reset the BIOS (if the previous steps do not help)
To return the BIOS to "factory" settings, you must:
- Go to tab « exit » (usually follows Boot);
- Select item " load Setup (Optimal) Defaults » → confirm the action by pressing « Yes ". The computer will restart.
Solving a problem when using a PS/2 keyboard and mouse
Failures in these devices are quite rare and are mainly related to BIOS and hardware failures. Before doing the following necessarily power off your computer. This precaution is due to the fact that ports PS/2 it is highly recommended not to touch it while the system is running. If you are using the standard PS/2 periphery, you should:
- Check and clean the connector / port of the keyboard and mouse from various types of contaminants;
- Try similar USB hardware;
- Swap mouse and keyboard connectors;
- Update the motherboard BIOS to the latest version.
The computer does not see a bootable USB flash drive and / or other USB devices when installing Windows 7
The solution to this problem in most cases is quite simple. And before you start delving into this chapter, you need to do the following: If the installationWindowsdoes not seeUSBdevicesgenerally, contact . It provides some general steps to resolve the most common failures.
The Windows 7 setup wizard does not see the hard drive (SSD) or asks for a driver
Before starting to perform actions that affect the software part, you need to make sure that the drives are working and that the computer settings are correct. Note. Next actions are relevant forSSD. If in the window for selecting a disk for installation missing desired "hard drive" (hard drive), try first:
- Verify cables and mounts HDD/SSD;
- Disable extra drives, leaving only the one on which the OS will be installed;
- Toggle mode « SATA mode » With « AHCI » on the « IDE » (any other available);
- Turn off computer;
- Enter BIOS (or « Setup Menu » ) by pressing the button F1 (F2, F12, Delete) immediately after turning on the computer at the stage when the logo of the manufacturer of your motherboard is displayed on the screen;
- Using the arrows, find the item in the menu « Configure SATA as » or « SATA Configuration / mode » (depending on your BIOS);
- Change mode « AHCI » on the « IDE » or « RAID » ;
 Figure 3. Set the value IDE for the line Configure SATA as.
- save settings, selecting an item « exit Saving Changes » tab « exit » . The computer will restart with the changed configuration.
- The OS install still doesn't see your HDD or SSD;
- Mode « SATA mode » has already been posted on « IDE » .
Manual installation of hard drive or SSD drivers
It is recommended to proceed to this chapter after fully familiarizing yourself with the previous one. This will help eliminate unnecessary steps.In most cases, the installation image already contains software for many storage controllers (SATA drivers). However, if the motherboard model of your computer / laptop is quite recent (or, conversely, old), drivers may simply be missing.
Therefore, we need to independently “specify” them at the stage of selecting a system disk. The following instruction will describe this process in more detail. Let's get started.
STEP 1 - find the necessary software.
Download the drivers from the manufacturer's website of your laptop or motherboard. First of all, we focus on files that include one or more word examples: INF,
SATA,
RAID,
RST.
STEP 2 - unpacking and dumping onto media with an OS image.
Unzip the downloaded file into a separate folder → copy it to any location on the installation flash drive.
note that we need drivers should not contain executable." exe" files. Only fit unpacked(such drivers usually include folders: amd,
x64
, as well as many .
inf files).
STEP 3 - specifying the required software in the disk selection window.
We insert the USB flash drive into the computer → we reach the disk selection stage for installation. Here you need to find the button(or "Review"
) and click on it.
An explorer will open in which you need to specify the required driver .
 Figure 4. Select the desired folder with the driver.
The hard drive (SSD) will be detected if the appropriate drivers are selected. Now you can continue the process by selecting the SSD drive that appears.
Drivers are installed, the drive is displayed. However, the wizard does not see or does not allow you to select the desired section
In this case try remove markup HDD/SSD directly in the window disk selection. Attention! The following steps lead to formatting drive and, consequently, to the complete loss of data. Make sure all your important files are backed up on a separate drive.For this you need:
- Push button "Disk Setup" at the disk selection stage;
- "Delete"
all available partitions to start the installation on unallocated space
- Check the integrity of the OS image on the installation disk;
- Re-write the image to another disk with the minimum speed;
- Use flash drive(preferably USB version 2.0) instead of a CD;
- Make sure that the drive is working: check the connection, power supply contacts, the operability of the motor and drive.
The steps above will help resolve your issue. Otherwise resetBIOS and try a different OS image/build.Also, in extremely rare cases, reinstalling the driver for the DVD drive can help. Detailed information can be found in the "" chapter, and drivers for the drive can be found on the manufacturer's website.
Conclusion
If none of the above methods helped, try looking for a problem in the computer components (on your own or with the help of a specialist).