How to install an older version. How to install a new Windows while keeping the old version of the system working? How to return an old version of iOS
When switching to a new version of the OS from Microsoft, it is quite natural to want to do it smoothly, consistently. If you are accustomed to the interface and functions of the seven, and want to take a closer look at Win 8.1 or 10, without deleting the seventh version that has already become familiar to you, this can be easily done. After all, based only on reviews, screenshots and opinions of other users, it is sometimes not so easy to make a choice for yourself. It is worth looking at the new OS with your own eyes, and then you can decide whether it is right for you or not. If the new system turns out to be too heavy for the hardware configuration of your PC, or you simply do not like it due to the presence of unnecessary functions or an overloaded interface, at any time you can return back to the already familiar operating system (say, seven) without reinstalling the OS.
How to install a new Windows without removing the old system that has already become familiar to you? This will be discussed in the presented article. With two systems on one PC, each time you turn on your computer, you can choose which system to boot. This approach is very flexible and convenient. You don't need to worry that your loved one file manager or the game does not work in the top ten even in compatibility mode, and it is not known whether it will run in it in the future. Just download Win Seven, and freely use those applications that are not supported in the new OS by the developers, and in the top ten you can work with new programs.
Suppose your current operating system is Seven. It is worth noting that the instructions described in this material are suitable for any of the systems of the Windows line, starting with XP (XP, Vista, 7, 8 / 8.1, 10), that is, you can install any configuration. It is important that the second installed OS is a newer version than the active one. That is, if there is a seven on the computer, you can put 8 / 8.1 or 10, but not Vista. If you install a second earlier system, all information in the MBR, boot files and boot sector will be deleted, and you can only work with the second, that is, the previous operating system. In this article, we will describe the process of installing Windows 10 in conjunction with 7.
Installation procedure instructions
Before the installation process, you need to make sure if there is an unallocated logical device (D, E, etc.) on your hard disk. If you installed two hard disk, you can install the second OS on an additional hard drive, specifying a clean non-system partition during installation as a place to store system files. If you don't have a second hard drive, let's create another, new partition. This can be done both with the help of special external applications (AOMEI Partition Assistant, Acronis Disk Director Suite), and with standard tools. We use the second option - for this we open the "Run" form by pressing the key combination Win + R, or using the "Start" menu.
Enter the command “diskmgmt.msc” in the text box that appears and click OK.

The disk management manager will open in front of you. Let's create a new partition D. To do this, first you need to shrink the partition with the largest volume, separating the unallocated disk space from it. In our case, this is partition C. You can have any other disk, as long as there is free space on it. Right-click on the selected device and select the "Compress" option.

In the form that opens, in the "Compressed space size" field, indicate the amount of disk space that will be required for new system(for Win 10 the minimum is 25-30 GB). After specifying the value, click the Compress button.

As a result, on the visual ruler hard disk an unallocated sector should appear. We will put a new ten on it.

All these actions can be performed right during the installation of the second system, but it will be more difficult to do there. So choose which of the options you like best.
The next step is to download Windows image 10 from the network and burn it to a DVD or USB flash drive. Finding the ISO image of the system will not be difficult, use the usual Google or Yandex search. Also, dozens of distribution kit can be downloaded at official website... Pay attention to the language and bitness of the image. As for the first, you probably need a Russian version. The bit depth is also an important point. You need to focus on the 32-bit or 64-bit version, based on the bit capacity of your processor and the amount of RAM. If you have a 64-bit CPU and more than 4 GB of RAM, the 64x image is the one to go for. If the volume random access memory less, you can get by with the 32x-bit version.
Here's how to write the distribution kit to an external drive. Here the recording process is described in detail and in every detail. When you download from the manufacturer's official website, your PC will have a special proprietary Windows 10 installer from Microsoft, which includes all the tools for writing installation files to the appropriate media.
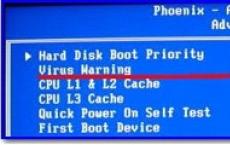
Next, using the BIOS settings, you need to boot the PC from an external drive (laser disk or USB flash drive where you wrote the distribution kit). How to make these settings is described in the same material.
When everything is ready, insert the media into the computer and boot. If the parameters in the BIOS are set correctly, the display will show the message “Press any key to boot from CD or DVD”. Press any button on the keyboard.

After choosing the language, confirming the license and specifying the type of installation, we proceed to the form of partitioning the hard disk.


If you have done all the partitioning work beforehand and you have 25-30 GB of unallocated space, select the unallocated area to install the second system and click Next.

If there is not enough free space, you will have to delete one of the occupied partitions, which will expand the unallocated disk space. It is important to understand that deleting a partition destroys all data on it. That is why we advise you to do all the partitioning in advance, in the disk manager on the live system, because there the partitions can be compressed rather than deleted completely, which will prevent data loss.
So, the main phase of the installation begins. It will take a while, so please be patient.

All subsequent stages of installation are described in the same material, and we will not dwell on them.
Finally when Windows installation 10 on a laptop, computer or tablet is completely finished, the device reboots, and the next time it is turned on, a boot menu appears on the display with a choice of the system to start. After selecting the desired item, you can use any of the versions (see the picture on the main page).
Interesting possibilities are provided by the additional option "Change the default values or select other parameters" located at the bottom. When you click on it, a subform appears. Here you can set a timer to display the system selection menu, after which the default OS will be loaded. You can also specify Windows version for automatic download, which will occur if you do not act during the interval specified above.

Let's click on the third item "Select other parameters". In this menu, the most interesting option is "Diagnostics".

The first option "Return the computer to its original state" is useful if the integrity of the system has been violated (that is, you cannot manually remove applications, install new ones, do not load, etc.). As a result of this rollback, you can reinstall Windows, removing non-factory applications and settings, while preserving personal data and documents. A similar operation can be done through the GUI in the top ten.
Now about the last subform "Advanced Options", what functions does it provide?

The first option allows you to restore the system using the restore point mechanism. Such checkpoints are created automatically during the installation of some programs, and are also generated manually by the user before major changes are made to the OS. The next menu item "System Image Restore" will be useful when you return Windows to its initial state using the ISO-image of the distribution, saved on the hard drive (very useful in the absence of a bootable disk with Windows).
Another useful item is "Startup Repair". If the system fails to boot, it will help fix the system records and return bootability. The command line is an indispensable tool for system administrators; for ordinary users, it is of little interest.
The fifth option "Boot Options" is used to debug Windows in safe mode... The last option "Return to the previous build" will come in handy if, as a result of the OS update, bugs, frequent freezes or lags occur. This is possible if the new assembly is not sufficiently tested and was released in a raw form. Rolling back to an early build will remove options and applications installed in the new branch, but personal files will not be affected.
Using the described instructions, you can completely cope with the question of how to install a new Windows in parallel with 1 or 2 other systems on one hard drive, provided there is sufficient space.
Sometimes you need to install more old version package / program due to stability or other reasons. Let's see how to do this.
APT always installs the most recent version of the package available. And if you have any problems when working with new programs installed from a third-party repository, then in such cases a utility that will rollback all versions of packages from a third-party repository to the native ones from the official repository is a good solution.
But it happens when you need to install a package or program from a third-party repository that is lower than the version in your native repository, or you have a connected repository in which there are several programs, but you want to rollback only a certain program. How to be?
Consider downgrading the Gimp.
Installed version 2.9.1.83
from a third party repository, but I want to put the version 2.8.6.0
, and in the native repository only the version 2.8.6.1
, which, for example, also works poorly or does not suit me, etc.
First, we will find and connect the repository with the required version of the program, and also make sure that the version of the program is available for your OS. To do this, go to the Launchpad.net service and look for available versions of the program.
We connect the repository:
sudo add-apt-repository ppa: noobslab / ppa-gimp
sudo apt-get update
Now we look at the list of available software versions:
apt-cache policy gimp

Yeah, the required version is present, so we move on.
Let's remove the package, the version of which we want to downgrade, so as not to suffer from dependencies and other problems in the future. We also remove the dependencies:
sudo apt-get purge gimp
sudo apt-get autoremove

The packages have been removed, let's start installing the required version of the program:
sudo apt-get install gimp = 2.8.6 ~ saucy ~ NoobsLab.com

And here are the pitfalls! I have not specified versions for dependency packages libgimp2.0 and gimp-data... As I wrote above, APT always installs more recent versions of packages, that's why it happened.
We manually specify these packages:
sudo apt-get install libgimp2.0 = 2.8.6 ~ saucy ~ NoobsLab.com gimp-data = 2.8.6 ~ saucy ~ NoobsLab.com
Posted on 10/16/2019
Your question:
How do I install an older version?
The master's answer:
If your computer has graphics problems, then don't think that you can solve them by installing a new driver for the NVIDIA video card. Often there is such a situation when it turns out that the programs worked much better with the old version of the driver. Attention, then you will need to follow several steps in a specific sequence to install an older version of the driver for the NVIDIA video card.
Before installing an older version of the driver, you must decide where you will install it from, either you get it from the Internet, or install it from the disc that comes with the video card. In the second option, everything is simple and straightforward - you just load the disc, and the installer's instructions will tell you what to do next.
If you do not have a disk and you decided to download the old version of the driver from the Internet, then there is a search problem. To resolve this issue, you should visit the official NVIDIA website, and then go to the "Drivers" section. In the menu that appears, select the "Beta and archived drivers" item and select it with the left mouse button.
In the window that opens, through the lines of the drop-down menu, enter the type, series and family of the installed video card, in addition, you should note the installed "operating system" and its language. To do this, select the "Search" button and wait for the list to be built.
On the official website, select the required driver version from the installed list and click on it with the left mouse button, this action will take you to the driver page. After going to the page, take your time, but first read the information and select the "Download now" button. Specify the path to save the downloaded file and wait when it is downloaded.
First, be sure to uninstall the version of the driver currently installed on your computer. Typically, this action is performed in several ways. For example, you can simply click on the icon of a freshly downloaded file. When the installer has completely collected all the information, it will give you a signal that the current version will be replaced with a new one and will automatically uninstall the previously installed one.
The second method involves removing the installed driver yourself. To do this, right-click on the "My Computer" icon and select "Properties" in the menu. A window will appear in front of you, you go to the "Hardware" tab and click on the "Device Manager" button.
From the list of equipment presented to you, select the item "Video adapters". By clicking on the line, or highlighting the "+" symbol to the left of it, you will see your video card. If you do double click on it with the left mouse button, a window will open in front of you, in which you can go to the "Driver" tab and select the "Delete" button.
You need to confirm the removal of the driver version and restart your computer. After restarting the system, do not be alarmed, as the desktop is not fully displayed, but only in limited mode. Start installing the older version of the driver that you downloaded on the Internet, you can do this by clicking on its icon with the left mouse button. Strictly follow the installer instructions until the driver is fully installed. Restart your computer.
And finally, a few useful tips... In a situation where you do not know which video card is installed on your computer, click the "Run" item from the "Start" menu, type "dxdiag" into the line and look at the information about the video card on the "Display" tab. In the same way, you can see the version of the driver currently installed on the PC.
Most fans of the Skype program have long appreciated all the advantages of the latest versions, such as the ability to maintain performance in the background, besides, its significant disadvantages were discovered: frequent occurrence of unforeseen malfunctions and problems in work, an unusual interface, as well as not entirely aesthetic emoticons. Therefore, many Skype users have become increasingly preferring the old version of this program.
Finding an old version of Skype
Many lovers of unlimited communication often face the following problem: where to find the old version of Skype? But, fortunately, it is quickly resolved. There are two main ways to find an old revision:
- You can go to the official website of the developer of the Skype program and in a specially designated window find the desired and the best version Skype.
- A more time-consuming option: if you did not delete all the system files that you previously used when installing an older version, then you need to find them in the system folders. Then all the information about the old version of Skype can be used to install it.
Important: before installing the old modification, you must definitely get rid of the new modification.
To, you need to perform the following sequence of actions: start - control panel - add or remove programs. In the list that appears on the screen of your computer, you must select the required version of Skype and confirm its removal.
Downgrading an old version of Skype
Professional programmers know exactly how to get back the old version of Skype and how, if necessary. Therefore, it is important to follow their advice in everything. For a high-quality return of the old version of the Skype program to your computer, I recommend using the system data rollback method:
- In the start menu, you need to find the item all programs and find a special standard folder. Then it is important to go to the service section and double-click on its icon.
- After that, you will see a list in which you should select the System Restore button.

Important: in this field, you need to rollback exactly to the date when the Skype program received the update of the system files.
Installing and connecting the old version of Skype
After a successful rollback of system data, you need to remove the newest version of Skype from your computer and perform a full installation of its older modification. To make this process more successful and avoid unpredictable troubles, you must constantly and unswervingly follow all the pop-up tips from the developers of the Skype program.
After you install the old modification, a window will open where you can register in the old Skype. In all free fields, you must enter your personal data: login and password from your account.

To use popular program Skype was the most convenient for you, you need to check the box next to the save password at the moment of entering your personal data, which will ensure the systematic automatic connection of your account with each next download of the program.
Thus, if you need an old version of Skype, you should definitely follow a simple algorithm of specific actions, as well as pay special attention to the advice of professional programmers.
Sooner or later every user mobile devices from Apple is faced with the thought that it might be worth bringing back the old iOS version... There may be many factors for this - a new unusual interface that came with the next update, errors in the new version associated with flaws or poor compatibility with a particular device.
The company itself has never welcomed the return to the device of previous versions of software and, strictly speaking, neither the iPhone nor the iPad supports installing older versions of iOS. However, after the release of a fresh iteration operating system, users have a couple of weeks to properly study the new version, decide on the choice and, if desired, do the so-called rollback of the firmware to the previous version.
With the release of iOS 9, this question has again become relevant for some users, and therefore we want to remind you in this guide how to return an old version of iOS.
Necessary preparation
First of all, we recommend that you make a full backup of your device both in iTunes on your computer and in cloud storage iCloud. The procedure for returning the previous firmware version itself implies the complete erasure of information from your device and the restoration of absolutely clean software. Accordingly, you must have a backup copy from where you can restore all your personal information and files.
Copying is desirable to be done in two of these ways at once, since on some versions of iOS it was impossible to recover data from backup made with a more recent firmware.
After that, in your device, be sure to follow the path Settings> iCloud> Find iPhone or iPad and disable this feature. This is done temporarily in order to remove protection from software your device and after restoring the firmware, the function will be turned on again automatically.
How to return an old version of iOS
To start restoring the previous version, you need to download the firmware file itself, and to carry out the procedure for installing it on your iPhone or iPad, you need a computer, the latest version of iTunes and a USB cable.
- Go to getios.com.
- In field YOUR DEVICE select the Apple mobile gadget on which you are going to restore the old version of the software.
- In field THE MODEL please indicate your device model.
- In field iOS VERSION select the version of iOS you want to restore. Keep in mind that Apple only supports downgrading one firmware back and only for a few weeks after a new version is released.
- Click the button DOWNLOAD and wait until the firmware file is fully loaded.
Now you can move on to the recovery process itself:
- Open iTunes. For any operations with firmware, it is advisable to use only the most recent iTunes version, therefore, before starting the procedure, check for updates and install them if necessary.
- Connect your device to your computer with a cable and wait for iTunes to recognize your device.
- Open the page for managing your device in iTunes.
- While holding down the Shift key on your keyboard (or Alt if you are using a Mac computer), click the Refresh button in the Device Control window.
- In the Explorer (or Finder, if you are using a Mac computer) window that opens, select the firmware file that you downloaded in the previous step.
- Confirm your intention to install an older version of the iOS operating system.
- After that, the process of restoring the firmware will be launched. You can watch its progress in the upper part of the iTunes window.
During the installation of the firmware into the device, it cannot be disconnected from the computer and it is advisable not to press anything until a white screen with a welcome message appears. It will mean that the process has been completed successfully and the device can be activated.