Disable Windows 10 laptop password. step. Disable display of the code entry window when exiting hibernation
 The password ensures the security of any operating system. Thanks to him, no one can see what you did on the PC while you are not around. It is clear that the Windows password will not save from intruders, for example, with a boot disk, but this can take a lot of time. In a simple situation, if you have gone away for 5 minutes, just press Win + L and the device will be locked. The creators of Windows 10 paid great attention to the security algorithm: now there is not only a password, but also a pin code. But sometimes they are simply not needed, for example, when your computer is used at home. As it turned out, disabling the Dozens password is not so easy, but there are still ways and there are many of them. It is about how to remove the Windows 10 password at the entrance that we will talk about in this article.
Below you will find all the information on how to reset your password on Windows 10 at login and after waking up your PC. You can do this through the control panel, the registry editor, power configuration (this option is needed to disable the code request when you turn on the computer after hibernation), or applications that will do everything for you. You can even completely remove the user's password. All this is described in detail below, and each step is accompanied by a screenshot for clarity.
In order to be able to turn off the request for confidential data when logging in, you need to have access to administrator rights (usually they are on all PCs). At the end of the article, you will find a video that also describes the process of disabling the password in Windows 10.
- We hold down two Win + R keys at the same time (Win is a button located, most often, in the bottom row of the keyboard on both sides, which shows the Windows logo). As soon as a small window opens, enter the word "netplwiz" or "control userpasswords2" (no need to copy the quotes). Then click virtual button labeled "OK". Both of these commands give the same result.


- To eliminate the password when entering the "Ten", select the user who needs to remove authorization, and uncheck the box next to the item indicated in the screenshot. When the setting is completed, press the key labeled: "OK".

- A window will open in which you will need to enter the password for your account. Microsoft records. Next, click "OK" and thereby confirm the action.

After closing the window, your PC will not require you to enter authorization data the next time you boot.
Editing the registry
If the option to edit the account for some reason did not work, you can try to disable the password in other ways. One of them is the registry editor. But before we get started, a word of warning - your password will be stored in plain text as one of the key values. Windows Registry, which greatly reduces the security of the operating system.
Note: A little lower we will show how to set up autologin when logging in through the registry, but without the “light” of account data. Third party software will be used.
- As in the previous case, we will launch the utility we need. Press Win+R. The editor itself is available in all versions of Windows. When the "Run" window opens, enter the value "regedit" (do not forget to remove the quotes) and click "OK".

- Next, go here: "HKEY_LOCAL_MACHINE", and then: "Software\Microsoft\Windows NT" and "CurrentVersion\Winlogon".

- You need to change the value of the "AutoAdminLogon" key to 1 (in order to expand it, just double-click on the inscription with the left mouse button).

- Now we need to change the value of the DefaultDomainName key to the name of our computer. You can view it in the system properties. To do this, open the Windows 10 search tool (located on the left side of the taskbar) and write down "system". Next, click on the item indicated in the screenshot.


- In the window that opens, we will see the name of our computer (see screenshot).

- It is impossible to copy data from here, and rewriting is inconvenient, especially in our case. If your PC has a complex name, click on the "Change settings" button.

- Next, open the "Computer Name" tab and press the "Change" button.


- Now the name of our PC can be copied.


- After we have received the computer name, we proceed to modify the “DefaultDomainName” key (if there is none, you can create it through the context menu of the right mouse button).


- We will assume that the key has been created. Run it by double-clicking the left mouse button and set the value to the name of the PC or your nickname when entering Windows.


After pressing the "OK" key, you can close the editor and restart your computer. Its next launch should occur without the need to enter a login and password.
Attention! If the method does not work using the computer name, try writing your account name instead, which you can see by pressing Win + R and entering the “netplwiz” command without quotes.
We remove the password entry when waking up the PC
It often happens that after some time of work you left your computer or laptop, and then returned, woke it up and were faced with the need to enter a password. This is all done with the same goal - data security, but if you have to go through authorization several times a day, it gets boring.
In order to correct the situation, there are several methods in the Windows operating system, which we will discuss below. First, let's talk about the simplest and safest - the regular "Tens" function. Let's understand how it works.
- To get started, open the system settings. They can be called through the OS search. To do this, click on the magnifying glass icon and enter in search string the word "options". Next, select the desired element in the search results.


- Now you need to find the "Login Options" section. To do this, we use the already known search algorithm settings. Enter the phrase in the line indicated in the screenshot and click on the desired item.

- In the new window, in the "Login Required" section, expand the drop-down menu and select the "Never" option.


Ready. Now when you wake up from sleep operating system will not ask for your password.
- Right-click on an empty area of the desktop and select the "Display Options" menu.

- On the left side of the window, click on Power and Sleep.


- Next - "Additional power settings".

- In the newly opened window, select "Setting the power plan".


- Then we press the inscription indicated in the picture.


- In the "Require password on wakeup" section, select "Never".


After that, Windows 10 will no longer care about your security and request authorization after waking up.
Note: on some computers or laptops, this method may not work due to the complete absence of the “Require password on wake-up” menu. In this case, use another method, which is described below.
Editing the Registry and Group Policy Editor
You can prevent Windows from requiring authentication after waking up from hibernation not only through the power menu, but also through the Group Policy Editor. Below we'll figure out exactly how to do this.
- Let's use the Run system utility familiar from the options described above. To do this, run it with the Win + R keys and enter the command "gpedit.msc" in the field, of course, without quotes. When finished, click "OK".

- Next, go to the directory "Administrative Templates" - "System", and then - "Power Management" and "Sleep Settings".


- Find the key that we highlighted in the screenshot with a red box and set its value to "Disabled". At the same time, if you have a laptop and have a battery, there will be 2 such parameters. Change each of them.


- We double-click on the indicated entry with the left mouse button and change the value to "Disabled". When finished, click "OK".


After that, Windows 10 will no longer ask you to enter your password the next time you wake up your PC or laptop.
Attention! Group Policy Editor is only in Pro Windows versions 10. For other systems, you should use the option with the registry editor.
Editing the system registry
For Windows 10 Home owners, we have prepared another way to disable authentication when the system wakes up. The fact is that there is no group policy editor and it is quite difficult to install it. It is much easier to use the regular registry editor and change the key responsible for autologin. That is what we are going to do now.
- First, let's open the Registry Editor. Press Win + R and enter the command "regedit" in the window that opens.


- When the utility opens, go to the path indicated in the screenshot and click on the folder highlighted in red once.


If such a section does not exist, it can be created using the context menu called by the right mouse button.
- On the right side of the Registry Editor, you need to create two new values if you don't have them. This is done by right-clicking on an empty space. Select the mode indicated in the screenshot.


- After both items are created, set their value to "0". To do this, simply double-click on the entry (left mouse button). When the operation is completed, click on "OK" and close the system registry.

Ready. No more hateful password will disturb you.
Attention! You may need to restart the machine for the changes to take effect and the authentication prompt to disappear.
How to remove a password from Windows 10 using third-party software
There is a program called Autologon for Windows. It is able to disable the password request without any manipulation of the PC. You can download the application on our website. We took it from the official resource, so the originality of the distribution is guaranteed.
As soon as the program is launched, you will be prompted to accept the terms of the license agreement and enter your Windows password. Next, click "Enable".


The application will notify you that it was successful and that your password is securely encrypted. All that remains to be done is to click on OK.

If you want to re-enable password protection on your computer, simply launch Autologon for Windows again and click on the "Disable" button.
For the program to work, you must run it as an administrator.
How to completely remove a password
The password can be completely deleted from the system. Let's figure out how to do it right.
First, we will use the command line functionality:
- Initially, we launch the command line itself (necessarily on behalf of the administrator). To do this, we run Windows search and enter the query "Command line". When the desired result appears, click on it with the right mouse button and select the entry "Run as administrator".


- As soon as the utility opens, copy the “net user” command (without quotes), paste it into the command line and press Enter.

- After the operator is triggered, we will see a list of all Windows users. Remember the nickname - we will need it in the next step.


- Insert the command "net user username" (without quotes) and press Enter.

After confirming the action, the password will be deleted and you will no longer need to enter it, which is what we needed.
Attention! If your nickname consists of several words, be sure to put it in quotation marks.
Additional Information
Many users complain that even after deactivating the password with all the methods described, it may need to be entered again. And this happens precisely after setting the computer to a screen saver. Below we will figure out how to get around this inconvenience and disable the password when logging into Windows 10.
- We launch the “Run” utility by simultaneously pressing Win + R and enter the command “control desk.cpl,@screensaver” into the window that appears, naturally, without quotes.


- Disable the screen saver - the item indicated in the screenshot should contain the word "No".


- Uncheck the box highlighted in red in the screenshot and click OK.


After that, the screen saver will be disabled and will not appear even after you restart your computer.
In the "Ten" a new feature appeared - "Dynamic blocking", which can be configured at: "Parameters" - " Accounts' and then 'Login Options'. If this mode is active, Windows 10 will become a password when communication with a mobile gadget connected via WI-FI or Bluetooth is interrupted.
Video tutorial: how to remove the password when logging into Windows 10
We hope our article will help you get rid of annoying authorization, which is absolutely not needed on your home PC and completely disable password entry in Windows 10. In case of problems, express them in the comments, and we will certainly help you.
What are the differences between them? When using a local account, you usually plan to work on one computer, without syncing settings, installed applications and objects on the desktop. This approach was used back in Windows 7, and it may not require you to enter a password when entering the top ten.
With the advent of Windows 8, the authentication method has changed, and now, along with using a local account, it has become possible to use a Microsoft account when logging in. At the same time, all OS settings are synchronized with the server, and you can log into your account from other devices. Microsoft account authentication requires the user to set a password every time they try to sign in to the OS.
In the material presented, I will share with you tips on how to get rid of it. It is advisable to do this if no one works at the computer except you, and you do not care about the safety of your confidential information (such as the password stored on the PC from Email, pin and code of a bank card, means of entry to other services). If someone else is working on your computer, it would be wiser to leave the entrance to the OS under lock and key.
Method 1 - by changing the user account settings
You can remove the password in Windows 10 different ways. One of them is to enable user account settings.
Open the mini-command panel through the "Run" menu by pressing the key combination Win+R(The Win button is the key on the keyboard with the Windows logo on it.) On the panel that appears, enter the command netplwiz.
A form opens with settings for user accounts. We select our active user in the list and uncheck the item that requires entering a username and password.

Click the "Apply" button. A form for confirming the operation appears, where you need to specify the current password for the active Microsoft account.

Enter the login password twice in the appropriate fields and click OK. We check that the checkmark in the field we need has disappeared, and reboot to check if our technique worked.
Method 2 - Using the Registry Editor
One of the main disadvantages of this method is that your password will be available for viewing in clear text in the registry, and anyone who is interested can see it. In addition, this algorithm is very reliable and convenient, so you can be sure of the progressive approach of this method.
We launch the registry editor when using a key sequence Win+R and entering the command regedit. The working window of the editor opens.
Opening a branch HKEY_LOUCAL_MACHINE\Softwares\Microsoft\WindowsNT\Current Version\Win logon.

- Change the value AutoAdminLogon by double-clicking on this field, as a result of which the value of the parameter should change from 0 to 1.
- Change the value DefaultDomainName to the domain name or the name of the local PC. You can always look at this value on the form of computer properties. To call it, right-click in an open explorer on the "This PC" object and select "Properties" from the pop-up menu. Here you will find the full name of your PC.
- Change the value of the field if necessary DefaultUserName to a different name, or simply leave the active user untouched
- Generate string element DefaultPassword, and in the "Value" field, enter the password of your current account.
Now it remains only to check the effectiveness of the procedure performed by restarting the computer and trying to log into the system.
How to remove the password entry during the exit from sleep mode?
When exiting sleep mode a form also appears asking for an account code. I'll take her away too.
To do this, go to the Windows settings by selecting the appropriate item in the Start menu.

On the parameters form, go to the subsection "Accounts" -> "Login Options" and in the first paragraph we change the value of the parameter to "Never".

Well, that's all, now you have the right to freely leave the computer for any long period of time, and the password request window will not appear.
Method 3 - reverting to local account authentication at login
As I said at the beginning of my article, the authentication method can be changed from local to Microsoft and vice versa. Let's say you chose the last option. Then, if you switch to a local account, the need to enter a password every time will disappear by itself. How to return to local authentication method? We go to the menu Windows Settings through the start menu.


The first number will prompt us to enter the password for the active account. So let's do it.

The next form will prompt you to enter a local account username and password. The username is entered arbitrarily, but the password fields are deliberately left blank.

Now everything is ready. We exit the operating system and log in with fresh parameters for authentication by clicking the button on the next window to log out.

Now we log in again and make sure that the password is not required.
So we figured out how to remove the administrator password when entering the top ten. Some of these methods are safer, others are more convenient and practical. We have tested them all and we can say with clear confidence that they all work. Choose any to your taste and enjoy the comfort of working in Windows 10.
To sign in to Windows 10, the user must enter the password for their local or online Microsoft account every time. This provides a certain level of protection of computer data from third-party access, but is inconvenient for home users, because. increases desktop access time. In this tutorial, we will look at how to remove the user password prompt on the Windows 10 login screen ( Windows Server 2016/ 2012 R2) and set up automatic login under a specific account.
A warning. Automatic logon is used for the convenience of the user, but reduces the level of data protection on the computer. Autologin should be enabled only if you are the only user of the computer and you are sure that no one else can access it. Otherwise, the security of your personal data is at risk.
Disabling password entry does not mean that your account should not have a password. Just at Windows boot 10 the password for entering the computer will be substituted by the system itself. In all other cases, for example, when accessing from another computer over a network or when connecting to a remote desktop (rdp), the password will have to be specified manually.
Disabling password entry in account settings
The easiest way to turn off the password prompt is in the user account settings of the system.

Note. On computers that are members of an Active Directory domain, you cannot disable the "Require user name and password" option due to . In this case, the easiest way is to disable the password request using the registry (described below).
Remove Windows 10 Login Password via Registry
Let's consider a more universal way to disable the password request - using the registry editor. This method allows you to disable the password prompt for a Microsoft account, domain account, or local Windows 10 account.
A warning. This method is also less secure, since your password will be stored in the registry in clear text and available for viewing by any computer user.

To enable autologon through the registry, you can use the following commands (replace root and [email protected] with your username and password, WORKGROUP should be replaced with your AD domain name if the account is a domain one):
reg add "HKLM\SOFTWARE\Microsoft\Windows NT\CurrentVersion\Winlogon" /v AutoAdminLogon /t REG_SZ /d 1 /f
reg add "HKLM\SOFTWARE\Microsoft\Windows NT\CurrentVersion\Winlogon" /v DefaultUserName /t REG_SZ /d root /f
reg add "HKLM\SOFTWARE\Microsoft\Windows NT\CurrentVersion\Winlogon" /v DefaultPassword /t REG_SZ /d [email protected]/f
reg add "HKLM\SOFTWARE\Microsoft\Windows NT\CurrentVersion\Winlogon" /v ForceAutoLogon /t REG_SZ /d 1 /f
reg add "HKLM\SOFTWARE\Microsoft\Windows NT\CurrentVersion\Winlogon" /v DefaultDomainName /t REG_SZ /d WORKGROUP /f
reg add "HKLM\SOFTWARE\Microsoft\Windows NT\CurrentVersion\Winlogon" /v IgnoreShiftOvveride /t REG_SZ /d 1 /f
reg add "HKLM\SOFTWARE\Microsoft\Windows NT\CurrentVersion\Winlogon" /v AutoLogonCount /t REG_DWORD /d 1 /f
Disabling the password request when leaving their sleep mode
It may also be worth disabling the password prompt when the computer wakes up from sleep mode. The easiest way to do this is with the modern Control Panel interface.

Safe way to enable autologon in Windows using Autologon
To more securely enable automatic login in Windows 10, you can use the system utility Autologon for Windows. In addition, all previous methods to enable autologon in Windows may not work if the computer is included in an AD domain. The utility was part of the Sysinternals system utilities and is now available for download on the Microsoft website (https://technet.microsoft.com/ru-ru/sysinternals/autologon.aspx).

To disable automatic login to Windows 10, just click on the Disable button.
So, we looked at how to disable password entry when logging into Windows 10 and boot the computer directly to the desktop. To temporarily disable Windows Autologon and manually select a user and password to log in with, hold down the Shift key while Windows boots.
Password to enter the OS - reliable protection of data on the hard drive from being viewed by strangers. But if computer equipment is at the disposal of only its owner, then access restriction is unnecessary. To remove the password when logging in Windows system 10, you will need to erase the code word written there earlier in the settings of the created entry. But often the removal of restrictions is remembered when it is impossible to enter the OS, the user table parameters are not available. In this case, they use tricks.
Cancel password entry for a user account
Cancellation is carried out using a special panel. It is called by the WIN + R keys. In the "Open" field, copy the phrase "control userpasswords2" or "netplwiz" (paste without changing). Confirm the operation by clicking "OK". Then do the following:The ability to remove the passphrase entry is available only to the administrator and a user with public access. If the record is of a different type, or the PC is part of a domain, then the checkbox will be unavailable.
Cancel password entry when waking up from sleep mode
Restrictions on entering the OS will also work when the PC or laptop wakes up from sleep. The key to the record must be specified each time the equipment wakes up, which is not very convenient. When it is required to leave limited access to the OS entry when the equipment is turned on, but remove it for the duration of operation, they act as follows: If you still need to enter a code word, you can configure the sleep mode to work directly. Standard settings - 5 minutes in the absence of operations in the system. This period can easily be extended to tens of minutes or even several hours. Then the password will have to be entered less frequently. You can set up sleep mode by right-clicking on an empty area of the screen, then selecting "Screen Settings". Here go to "Power and Sleep". Select the required time.
Using the Registry - For Advanced Users
If the previous methods failed to achieve the desired result, then to remove the password when logging into Windows 10, it remains to use the registry editor. Press the keys simultaneously on the keyboard WIN+R. In line " Open» prescribe "regedit". Further: Important! It is not recommended for novice users to make changes to any registry blocks. Mistakes can cause the system to crash.
 Turn off the prompt through the "Power Options" section on wake-up
In the Control Panel menu there is an item "Power Options". You need to enter it, select in the marked scheme " Settings …". Click the link in a new window advanced settings. Here, in the central block of the window, expand the item " Balanced"and in the section" Require password..." select " Not". To restart a computer.

Account settings
If the password is not forgotten or lost, you can simply cancel it. Logging into the user's OS is controlled by the recording settings. By changing them, it is easy to remove the password. You need to do the following: This is the easiest and safest way for beginners to remove the password previously assigned to the system. But the method will work if the code word used in the entry is not forgotten by the user. In this case, you will have to resort to one of the above methods. For users who have not previously changed system settings, it is better not to use the password removal through the registry. He's not safe. It is worth resorting to the help of the control panel and the registry only in cases where the standard method does not fit. When making changes to the system settings, it is necessary to double-check the recorded data. This will save you from mistakes.
 At the final stage Windows installation 10 the installer requires you to enter your username and password from your Microsoft account or register a new account. If you agree to enter these data, the operating system will begin to require you to enter a password every time you turn on the computer.
Naturally, this is quite annoying, so many users are wondering how to turn off the password request in Windows 10. And now we will try to answer this rather popular question.
Step number 1. Run the "netplwiz" command.
In order to disable the password prompt in Windows 10, you need to set it to automatic entry. To do this, we need to open the User Accounts window. To do this, you need to run the "netplwiz" command. Therefore, open the "Run" menu (key combination Windows-R) and enter this command.
You can also run the “netplwiz” command through the Windows 10 search bar. In this case, you need to enter “netplwiz” in the search and open the program that the operating system will offer you.

Step #2: Disable Password Requirement in Windows 10
After executing the “netplwiz” command, the “User Accounts” window will appear in front of you. In order to disable the request here, you need to uncheck the box next to the "Require username and password" function. After that, just click on the "Ok" button.

Step number 3. We confirm the disabling of the password request.
After you have unchecked the box and clicked on the “OK” button, a window will appear in front of you to confirm the changes. In this window, you need to enter your current password twice, which you currently use to log into Windows 10.

After entering the password and clicking on the "Ok" button, the password request will be disabled. And the next time you start Windows 10, you will no longer have to enter it.
It should be noted that this method of disabling the password request should be used only in cases where there is no danger that your computer will be used by strangers.
Addition. The method described above only works to turn on the computer. After exiting sleep mode, the password will still be requested. In order to disable the password request when waking from sleep mode, you need to make some additional settings.
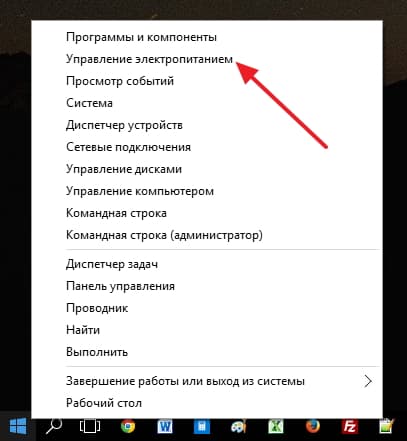
If you have Windows 10 without the latest updates, then you need to open "Power Management" and disable the password request for the active power plan there. This is done quite simply. Right-click on the Start menu and select Power Management.


Here you need to activate the "Do not ask for a password" function and save the settings.
 As a result, we completely disable the password request.
If you have the latest updates for Windows 10 installed, then you will not have the settings described above in the "Power Options" section. In your case, you need to use the new "Options" menu. To do this, click the "START" button, go to "Settings" and open the "Accounts - Login Options" section there. In this section, there will be a feature called "Login Required" you need to toggle it to the "Never" state. After that, the system will not require a password either when turning on the computer or when waking up from sleep mode.

If you have "Windows 10 Professional" or "Windows 10 Enterprise", then you can also disable the password when waking up from sleep using the Group Policy Editor. To do this, run the "gpedit.msc" command and in the window that opens, go to the "Computer Configuration - Administrative Templates - System - Power Management - Sleep Settings" section. In this section, you need to disable two options related to asking for a password when the computer wakes up (marked in the screenshot below).

Again, the Group Policy Editor (gpedit.msc) is only available for Windows 10 Professional or Windows 10 Enterprise. If you have Windows 10 Home, then you can turn off the password prompt when waking up from sleep mode only through the Options menu.